• Can Solar Panels Be Installed on a Patio?

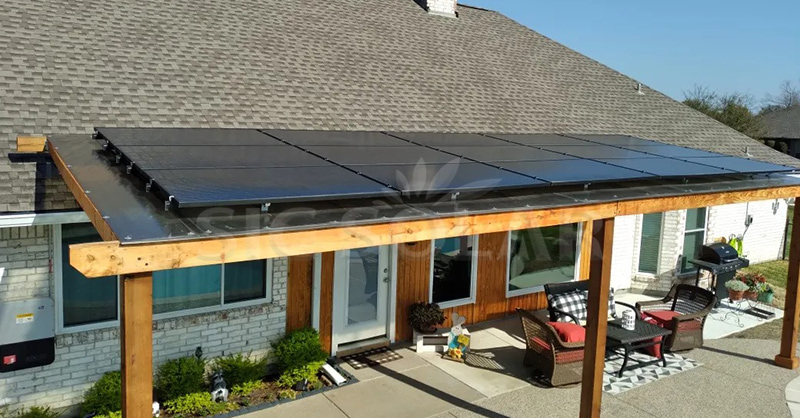
    Yes, solar panels can be installed on a patio, and it can be an excellent way to generate clean energy while maximizing outdoor space. Whether you have a covered patio, pergola, or standalone structure, integrating solar panels can provide shade, energy savings, and environmental benefits.

    Benefits of Installing Solar Panels on a Patio

    Efficient Use of Space – If your main roof isn’t suitable for solar panels due to shading or structural concerns, a patio can serve as an alternative installation area.

    Dual-Purpose Design – Solar panels provide shade and weather protection while generating electricity for your home.

    Lower Energy Costs – The electricity produced can help reduce energy bills by powering appliances, lights, and other household needs.

    Customizable Installation – Patio solar panels can be integrated into various designs, including pergolas, carports, or awnings, depending on space and aesthetic preferences.

    How to Install Solar Panels on a Patio

    1. Assess the Patio Structure

    • Check if the patio cover or pergola is strong enough to support the weight of solar panels.
    • If needed, reinforce the structure with additional steel or aluminum framing.

    2. Choose the Right Mounting System

    Depending on your patio design, solar panels can be installed using:

    • Tilted or Flat Mounting Frames – Ideal for adjusting the panel angle for maximum sunlight exposure.
    • Integrated Solar Roofing – Some homeowners opt for solar panel roofs, replacing traditional patio covers with semi-transparent solar panels for a sleek, modern look.
    • Ground-Mounted Extension – If a patio lacks structural support, ground-mounted frames can be placed next to it for solar panel installation.

    SIC Solar provides customized solar mounting solutions for patios, ensuring stability and efficiency while complementing the existing structure.

    3. Position the Panels for Maximum Sunlight

    • Aim for a south-facing orientation (in the Northern Hemisphere) for optimal sun exposure.
    • Adjust the tilt angle to improve efficiency, especially in areas with seasonal sun variations.

    4. Electrical Connection and Grid Integration

    • Connect the solar panels to an inverter and tie them to your home’s electrical system.
    • Consider adding a battery storage system to store excess energy for later use.

    Considerations for Patio Solar Panel Installation

    Structural Integrity – Ensure your patio is strong enough to support the panels and withstand wind or snow loads.

    Local Building Codes – Check with local authorities to ensure compliance with permitting and zoning regulations.

    Waterproofing – If converting your patio cover into a solar structure, proper flashing and sealing are essential to prevent leaks.

    Aesthetics and Design – Integrated solar panel designs can enhance the visual appeal of your patio while maintaining functionality.

    patio roof solar panels

    Installing solar panels on a patio is a smart way to generate renewable energy while adding shade and functionality to your outdoor space. With custom solar mounting solutions from SIC Solar, you can ensure a secure, efficient, and visually appealing installation. Contact us today to explore solar mounting options for your patio!

  • Can Solar Panels Be Mounted on a Pole?

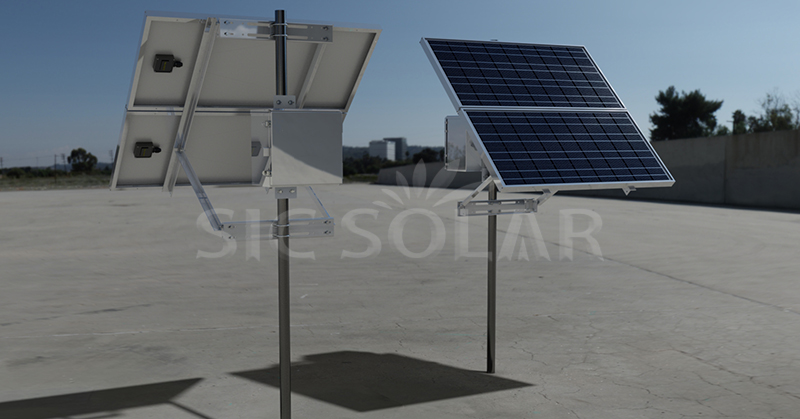
    Solar panels are typically installed on rooftops or ground-mounted structures, but pole-mounted solar panels offer a versatile and efficient alternative for certain applications. Whether for residential, commercial, or off-grid use, pole-mounted solar systems provide flexibility in positioning, optimal sun exposure, and space-saving benefits.

    What Are Pole-Mounted Solar Panels?

    Pole-mounted solar panels are installed on a single pole or multiple poles, elevating the panels above the ground. This setup is commonly used in rural or off-grid locations where traditional roof or ground-mount systems are not feasible.

    There are two main types of pole-mounted solar systems:

    1. Top-of-Pole Mounts – Solar panels are fixed at the top of a single pole, often with an adjustable tilt angle.
    2. Side-of-Pole Mounts – Smaller panels are attached to the side of a pole, commonly used for small-scale applications like lighting or surveillance systems.

    Advantages of Pole-Mounted Solar Panels

    Better Sunlight Exposure
    Unlike fixed roof-mounted systems, pole-mounted solar panels can be installed at an optimal angle and height, avoiding shading from trees, buildings, or other obstacles.

    Adjustable Tilt for Maximum Efficiency
    Many pole-mounted systems allow seasonal adjustments to the tilt angle, maximizing energy generation throughout the year. Some even come with solar tracking technology, which automatically adjusts the panel angle based on the sun’s movement.

    Ideal for Off-Grid and Remote Locations
    Pole-mounted solar systems are widely used for rural homes, farms, telecommunications towers, and remote monitoring systems where traditional mounting options are limited.

    Space-Saving Design
    By mounting panels on a pole, valuable ground space remains available for agriculture, landscaping, or other uses. This makes pole mounts a great option for properties with limited land area.

    Considerations for Pole-Mounted Solar Installations

    1. Structural Stability
      A properly installed pole-mounted system must withstand strong winds and weather conditions. High-quality solar mounting solutions, such as those offered by SIC Solar, ensure durability and stability.

    2. Ground Preparation
      The installation process requires digging and securing the pole with a concrete foundation, ensuring long-term stability.

    3. Accessibility for Maintenance
      Since pole-mounted systems are elevated, they are easier to clean and maintain compared to ground-mounted panels, but installation height should be considered for safety and accessibility.

    Choosing the Right Solar Mounting System

    For pole-mounted solar panels to be effective, using a strong and durable mounting system is essential. SIC Solar provides high-quality pole-mounting solutions designed for residential, commercial, and off-grid applications. Our solutions ensure:

    • Strong structural support for long-term reliability.
    • Adjustable tilt options to optimize solar energy capture.
    • Durability against harsh weather conditions.

    Pole Mounted Solar Array

    Looking for a durable and reliable pole-mounting system? SIC Solar offers expert solutions for all types of solar installations. Contact us today to find the perfect solar mounting system for your project!

  • Can You Put Solar Panels on a Carport?

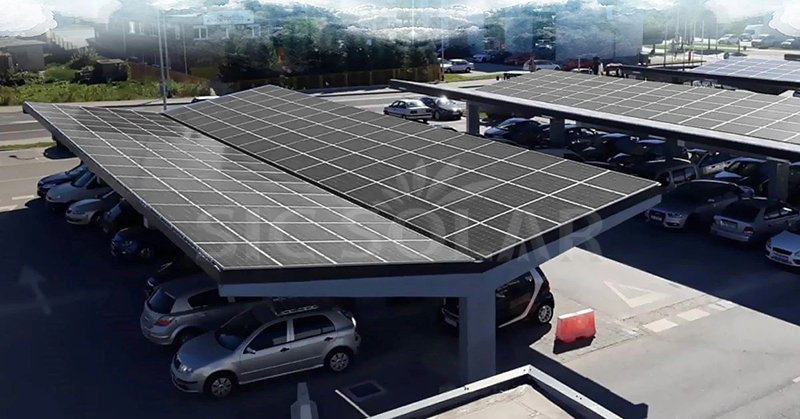
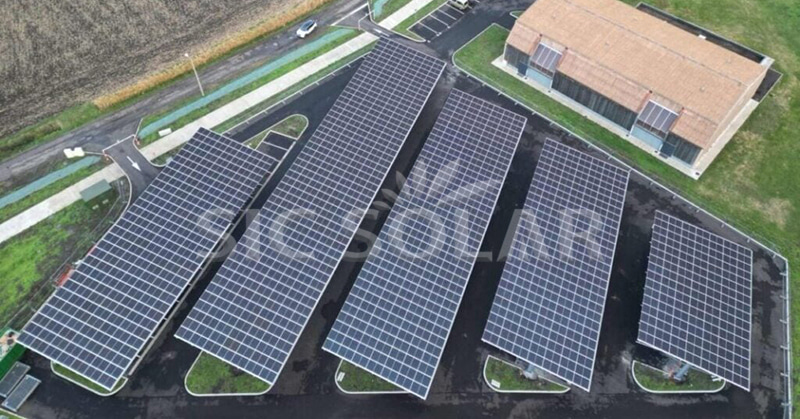
    Yes, installing solar panels on a carport is a great way to maximize space while generating clean energy. A solar carport is a specially designed structure that provides both shelter for vehicles and a platform for solar power generation. Unlike traditional rooftop solar systems, carports offer better positioning for optimal sunlight exposure and can be customized for various applications.

    Benefits of Installing Solar Panels on a Carport

    1. Efficient Use of Space

    Carports provide an ideal solution for solar installations, especially when roof space is limited or unsuitable for solar panels. Instead of using valuable land for ground-mounted solar systems, carports allow dual-purpose utilization.

    2. Optimized Sunlight Exposure

    Unlike rooftops that may have shading issues or non-ideal angles, solar carports can be designed with the perfect tilt and orientation to maximize energy output.

    3. Protection for Vehicles

    A solar carport provides shade and weather protection, reducing heat buildup in vehicles and shielding them from rain, snow, and other environmental factors.

    4. Scalable for Residential and Commercial Use

    Solar carports are suitable for homes, businesses, and large-scale parking lots. They can be installed in:

    • Residential driveways

    • Workplace parking areas

    • Shopping centers and public spaces

    • EV charging stations

    5. Compatibility with EV Charging

    Many solar carport systems integrate electric vehicle (EV) chargers, allowing car owners to charge their vehicles with clean, renewable energy directly from the sun.

    Key Considerations for Solar Carport Installation

    Structural Strength – The carport must support the weight of the solar panels and withstand weather conditions such as wind and snow loads.

    Mounting System – Using a high-quality racking system ensures secure and stable panel installation. SIC Solar offers custom solar carport mounting solutions that provide durability and easy installation.

    Permits and Regulations – Depending on location, building permits and electrical approvals may be required before installing a solar carport system.

    Energy Storage & Grid Connection – Adding a battery storage system can enhance energy efficiency by storing excess power for later use.

    Installing solar panels on a carport is a smart, space-efficient way to generate renewable energy while providing shade and protection. Whether for residential, commercial, or large-scale applications, solar carports offer aesthetic, functional, and financial benefits.

    Carport Solar Mounting System

    SIC Solar specializes in high-quality solar carport mounting solutions, ensuring stability and long-term performance. Contact us today to explore the best solar carport options for your project!

  • Can You Put Solar Panels on a Tin Roof?

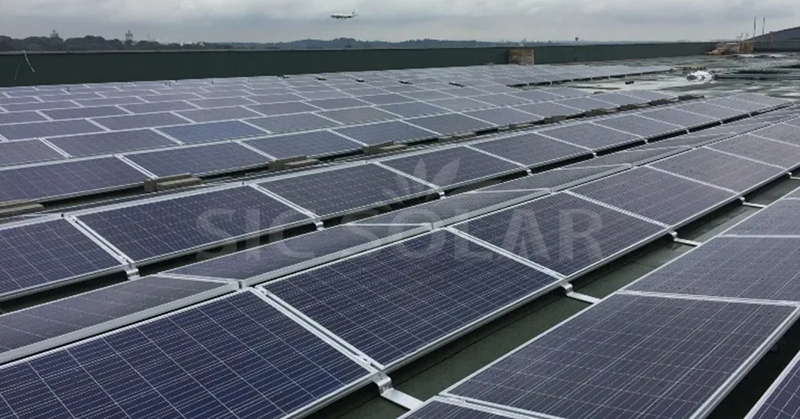
    Solar energy is a sustainable and cost-effective way to power homes and businesses, but many property owners wonder if they can install solar panels on a tin roof. The good news is that tin roofs are an excellent surface for solar installations, offering durability and ease of mounting. With the right solar racking system, tin roofs can support solar panels efficiently while maintaining structural integrity.

    Why Are Tin Roofs Suitable for Solar Panels?

    Tin roofs, commonly made of materials like galvanized steel, aluminum, or zinc, are lightweight, weather-resistant, and long-lasting. These qualities make them an ideal surface for solar panel installation. Here are some key advantages:

    Lightweight and Strong – Tin roofs can handle the additional weight of solar panels without compromising the structure.
    Corrosion-Resistant – Modern tin roofing materials are designed to withstand harsh weather conditions.
    Long Lifespan – Tin roofs can last 40+ years, matching or exceeding the lifespan of a solar system.
    Easy Installation – With the right mounting system, solar panels can be securely installed without damaging the roof.

    How Are Solar Panels Installed on a Tin Roof?

    The installation method depends on the type of tin roof. Here’s how solar panels are mounted on different tin roofing styles:

    1. Standing Seam Tin Roofs

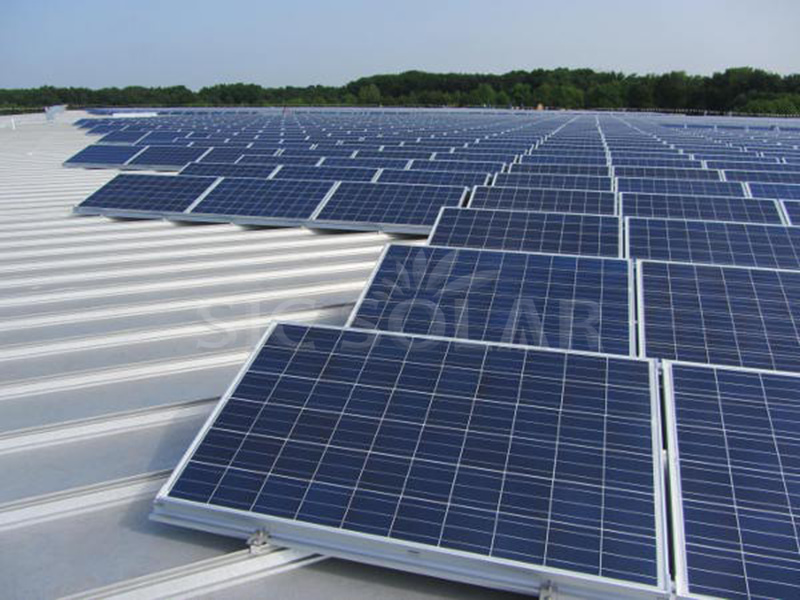
    Standing seam metal roofs are one of the best options for solar panel installation. Mounting brackets can be clamped directly onto the seams without drilling holes, preserving the roof’s integrity. This method is secure and minimizes the risk of leaks.

    2. Corrugated Tin Roofs

    Corrugated tin roofs have wavy ridges, requiring specialized mounting brackets that attach to the peaks of the corrugations. In most cases, installers use rubber-sealed screws to prevent water penetration.

    3. Trapezoidal Tin Roofs

    Similar to corrugated roofs but with a more angular design, trapezoidal tin roofs require customized brackets that fit snugly over the ridges. This ensures a secure installation while maintaining waterproofing.

    SIC Solar, a trusted manufacturer of photovoltaic mounting systems, provides high-quality racking solutions specifically designed for tin roofs. Their systems ensure secure attachment while preventing leaks and roof damage.

    Important Considerations for Installing Solar on a Tin Roof

    Before installing solar panels on a tin roof, consider the following factors:

    Roof Condition – Ensure the roof is in good condition before installation. If it is old or damaged, repairs or replacements should be done first.
    Proper Mounting System – Choosing the right brackets and clamps prevents roof penetration issues and ensures long-term stability.
    Wind and Weather Resistance – Secure mounting is crucial to withstand high winds and extreme weather conditions.
    Weight Load Capacity – Although tin roofs are strong, it’s important to check if the structure can support the additional weight of solar panels.

    Solar Panels On Steel Roof

  • How Are Ground Screws Installed?

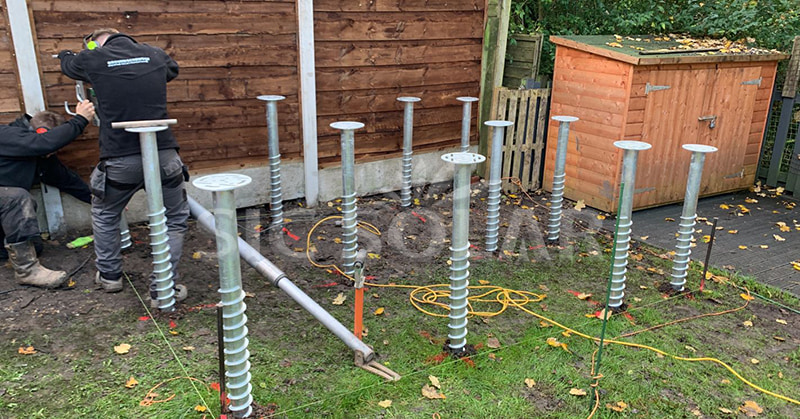
    Ground screws are an innovative and efficient foundation solution that can be used in a variety of building projects, including solar panel installations, fencing, and decking. Unlike traditional concrete foundations, ground screws offer a quick and environmentally friendly way to create a stable foundation without the need for excavation. In solar applications, they are a reliable anchoring method for ground-mounted photovoltaic systems. In this article, we’ll explore the step-by-step process of installing ground screws and why they are an excellent choice for solar mounting systems.

    Ground Screw System

    Step 1: Site Preparation

    Before installing ground screws, it is important to assess site conditions to ensure stability and longevity. Here’s what needs to be done:

    Soil Testing – Conduct a ground survey to determine the soil type and its bearing capacity. Sandy, clay, and rocky soils require different installation techniques.

    Site Clearance – Remove any large rocks, debris, or obstructions that could interfere with the installation process.

    Marking Locations – Mark the exact location of the ground screws based on the structural design of the solar mounting system.

    Step 2: Drive the Ground Screws into the Soil

    Once the site is prepared, the ground screws are installed using specialized machinery or hand tools, depending on the size of the project.

    1. Manual Installation (For Small Projects)

    For smaller applications, anchor screws can be installed manually using an anchor screw wrench or a metal rod as a lever:

    Position the anchor screw at the marked location.

    Insert the rod into the top hole of the anchor screw.

    Turn the screw clockwise while applying downward pressure to penetrate the soil.

    Continue turning until the screw reaches the desired depth.

    Pros: Simple, cost-effective, minimal equipment required.

    Cons: Labor-intensive, not suitable for hard or rocky ground.

    2. Mechanical Installation (For Large Projects)

    For commercial or large solar facilities, mechanical installation ensures precision and efficiency:

    Use a hydraulic or electric ground screwdriver to insert the screw into the ground.

    The machine applies a controlled force to drive the screw to the correct depth.

    Check the alignment of the screw to ensure vertical positioning.

    Pros: Faster, more precise, ideal for large solar projects.

    Cons: Requires specialized equipment and operators.

    Step 3: Check Stability and Alignment

    After installation, check each ground screw for stability and proper alignment:

    Leveling tools ensure the screws are installed at the correct angle.

    A torque test can be performed to verify the holding strength of the screws in the soil.

    Make any necessary adjustments before installing the solar mounting system.

    Step 4: Connect the Solar Mounting System

    Once the ground screws are firmly in place, you can connect the solar mounting system:

    Secure the brackets or mounting rails onto the ground screws.

    Then mount the solar panels to the mounting system.

    Connect the wiring and grounding components to complete the solar system setup.

    SIC Solar is a company that specializes in the production and sale of photovoltaic mounting systems, providing high-quality ground screw solutions designed for durability and ease of installation.

    Advantages of Using Ground Screws

    No Concrete Required - No excavation and curing time required, faster installation.

    Environmentally Friendly - Minimizes land disturbance and can be reused.

    Versatile Application - Suitable for a variety of soil types and adapts to different terrains.

    Cost Effective - Reduces labor and material costs compared to traditional concrete foundations.

    Ground screws provide an efficient and sustainable foundation solution for solar mounting systems, allowing for quick and safe installation with minimal environmental impact. Whether installed manually or using machinery, they provide a strong and stable foundation for solar structures. SIC Solar offers a range of ground screw solutions to ensure reliability and ease of installation for solar projects.

  • How Do Balcony Solar Panels Work?

    With the growing demand for renewable energy, solar power is no longer limited to large rooftop installations or ground-mounted systems. Balcony solar panels offer a practical and efficient way for apartment residents and urban dwellers to harness solar energy without needing extensive roof space. But how do these systems work, and what are their benefits? Let’s explore how balcony solar panels operate and why they are an excellent choice for sustainable energy solutions.

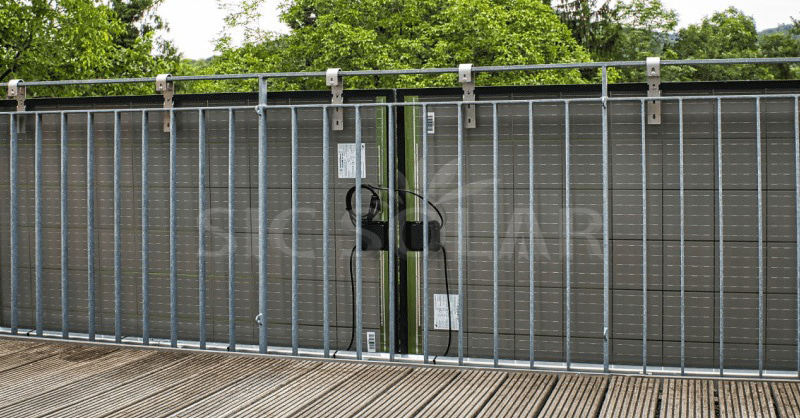
    Balcony Solar Mounting

    What Are Balcony Solar Panels?

    Balcony solar panels, also known as plug-and-play solar systems, are compact photovoltaic (PV) modules designed to be installed on balcony railings, walls, or small outdoor spaces. They allow apartment residents and homeowners with limited space to generate their own electricity, reduce energy bills, and contribute to a greener environment.

    How Do They Work?

    Balcony solar panels function similarly to traditional solar systems but on a smaller scale. Here’s how they generate and utilize energy:

    1. Sunlight Absorption

    The PV panels are mounted on balcony railings or walls, positioned to capture the maximum amount of sunlight throughout the day. The efficiency of power generation depends on the panel's orientation, tilt angle, and shading conditions.

    2. Conversion of Sunlight into Electricity

    Like standard solar panels, balcony systems use photovoltaic cells to convert sunlight into direct current (DC) electricity. This energy can then be used for household consumption.

    3. Inverter Conversion

    Since most home appliances use alternating current (AC) electricity, a micro-inverter is typically integrated into the system to convert DC to AC. Many balcony solar panels come with built-in micro-inverters for easy plug-and-play installation.

    4. Plugging into the Grid or Battery Storage

    The converted AC electricity can be directly fed into the home’s electrical system by plugging the panel into a standard power outlet. Some setups also allow for battery storage, enabling users to store excess energy for later use.

    Benefits of Balcony Solar Panels

    Easy Installation – Unlike traditional solar systems that require professional mounting, balcony solar panels are designed for simple DIY installation. Most models come with mounting brackets and clamps that can be attached to railings or walls without drilling.

    Space-Saving Solution – Ideal for apartments and urban areas where rooftop space is unavailable.

    Cost-Effective – Requires lower investment compared to full-scale rooftop solar systems, making it accessible for renters and homeowners alike.

    Energy Savings – Helps reduce electricity bills by generating power for household appliances.

    Eco-Friendly – Contributes to renewable energy adoption and reduces reliance on fossil fuels.

    Considerations for Balcony Solar Panel Installation

    Before installing balcony solar panels, consider the following:

     Sunlight Exposure – Ensure the balcony receives sufficient sunlight throughout the day for optimal energy production. South-facing balconies are ideal in the Northern Hemisphere.

    Structural Support – The balcony railing or wall should be strong enough to support the weight of the solar panels.

    Local Regulations – Check with building management or local authorities for any restrictions on solar panel installations in apartments.

    Quality Mounting Systems – Using high-quality solar mounting brackets ensures durability and safety. SIC Solar, a manufacturer of photovoltaic mounting systems, provides reliable solutions for securely installing balcony solar panels.

    Balcony solar panels are an innovative way for city residents to harness solar energy without needing extensive roof space. Their easy installation, cost-effectiveness, and energy-saving potential make them a great solution for those looking to embrace clean energy in urban environments. By using high-quality mounting solutions like those provided by SIC Solar, you can ensure a safe and efficient solar setup for your balcony.

    Looking for a reliable mounting system for your balcony solar panels? SIC Solar offers durable and easy-to-install solutions for maximizing solar energy efficiency.

  • How Do I Attach Solar Panels to My Roof?

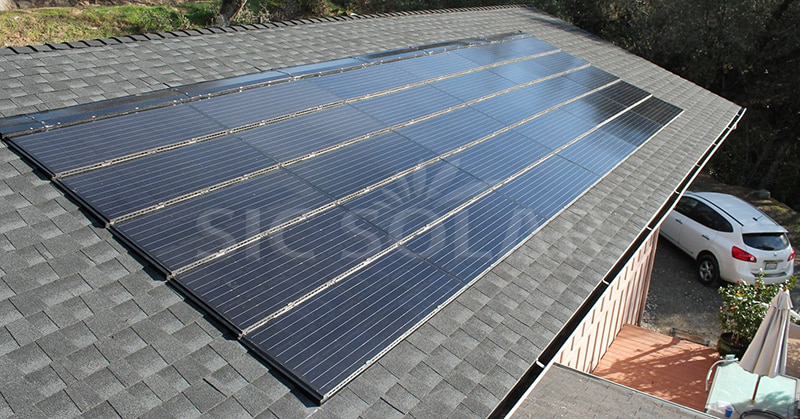
    Installing solar panels on a roof is an effective way to harness solar energy while making use of existing space. Proper installation is essential to ensure durability, safety, and optimal energy production. Whether for residential or commercial use, the right mounting system plays a crucial role in securing the panels and maintaining the integrity of the roof.

    Step 1: Assess Your Roof’s Suitability

    Before installing solar panels, evaluate whether your roof is suitable for a solar system. Consider the following factors:
    Roof Strength – Ensure the roof can support the weight of solar panels and racking.
    Orientation and Tilt – South-facing roofs (in the Northern Hemisphere) typically receive the most sunlight. The optimal tilt angle depends on your location.
    Shading Issues – Minimize shading from trees, buildings, or other obstructions to maximize energy production.
    Roof Material – Different roofing materials require specific mounting solutions.

    Step 2: Choose the Right Solar Mounting System

    Solar panels are attached to the roof using a mounting system, which ensures stability and long-term performance. There are three main types of roof mounting systems:

    1. Rail-Based Mounting System

    One of the most common methods, rail-based systems use metal rails to support solar panels. Brackets or flashings are installed onto the roof, and rails are attached securely before mounting the panels. This system offers strong support and flexibility in panel placement.

    2. Rail-Less Mounting System

    In this system, panels are directly attached to the roof without using long rails. Instead, mounting brackets secure the panels individually. This method is lightweight and reduces material costs but requires precise installation.

    3. Ballasted Mounting System (For Flat Roofs)

    For flat roofs, ballasted mounting systems use weights (such as concrete blocks) to hold the panels in place without penetrating the roof. This method is common in commercial installations.

    SIC Solar, a manufacturer of photovoltaic mounting systems, provides a variety of reliable mounting solutions designed for different roof types, ensuring a secure and efficient installation.

    Step 3: Install the Mounting System

    Once the right mounting system is selected, follow these steps for installation:
    1)Mark the Mounting Points – Identify where the brackets or flashing will be placed to align with the roof’s structural beams for maximum support.
    2)Secure the Brackets or Flashing – Attach mounting brackets using stainless steel bolts and waterproof sealants to prevent leaks.
    3)Install Rails (if applicable) – If using a rail-based system, fasten the rails onto the brackets to create a secure base for the solar panels.
    4)Ensure Proper Alignment – Check that all mounting components are level and properly spaced to support the panels.

    Step 4: Attach the Solar Panels

    With the mounting system in place, the solar panels can be installed:
    Position the Panels – Place each panel onto the mounting structure, ensuring they are properly aligned.
    Secure the Panels – Use clamps or brackets to fasten the panels to the rails or mounts. Ensure a firm grip to withstand wind and weather conditions.
    Connect Wiring – Wire the panels together following electrical safety guidelines, connecting them to the inverter and power system.

    Step 5: Final Inspection and Testing

    After installation, conduct a thorough inspection to ensure:
    ✔ The panels are securely fastened.
    ✔ There are no roof leaks or structural issues.
    ✔ Electrical connections are safe and functional.

    A professional installer can verify the system's performance and ensure compliance with local regulations.

    Solar Panels Roof Installation

    Attaching solar panels to a roof requires careful planning, the right mounting system, and proper installation techniques. With quality racking solutions from SIC Solar, homeowners and businesses can ensure a secure and efficient solar installation that maximizes energy production.

  • How Do You Attach Solar Panels to a Tiled Roof?

    Installing solar panels on a tiled roof requires careful planning to ensure a secure and watertight mounting system. Since tile roofs are more delicate than metal or shingle roofs, the correct installation method helps prevent damage, leaks, or structural issues.

    Steps for Attaching Solar Panels to a Tiled Roof

    1. Assess the Roof Structure

    Before installation, evaluate the roof’s condition and strength to confirm that it can support the weight of the solar panels. Important considerations include:
    ✔ Tile type (clay, concrete, slate, etc.)
    ✔ Roof pitch and orientation
    ✔ Structural integrity of rafters

    2. Choose the Right Solar Mounting System

    Using a high-quality solar mounting system is essential for securing the panels without damaging the tiles. SIC Solar offers durable and efficient tile roof mounting solutions designed to provide a stable foundation while maintaining the roof’s integrity.

    Common mounting solutions for tiled roofs include:

    • Tile Hooks – Installed under the tiles and attached to roof rafters for strong support.
    • Tile Replacements – Specialized mounting tiles that replace existing tiles, avoiding breakage.
    • Flashing and Waterproofing – Ensures a watertight seal around mounting points.

    3. Remove and Install Roof Hooks or Brackets

    • Carefully lift or remove specific tiles where the brackets will be attached.
    • Secure stainless steel tile hooks to the roof rafters using screws.
    • Ensure that the hooks sit flush and align properly for even panel placement.

    4. Install the Mounting Rails

    • Attach aluminum mounting rails to the installed brackets.
    • Use leveling tools to ensure that the rails are straight for efficient panel placement.
    • Double-check spacing and alignment according to the panel dimensions.

    5. Attach the Solar Panels

    • Secure the panels onto the mounting rails using mid-clamps and end-clamps.
    • Ensure proper torque and fastening to withstand wind and weather conditions.

    6. Electrical Wiring and Grounding

    • Connect the solar panels to the inverter and electrical system.
    • Properly ground the system to prevent electrical hazards.
    • Perform a final inspection and testing before activating the system.

    Key Considerations for Tiled Roof Solar Installation

    Use Non-Invasive Mounting Systems
    Avoid excessive drilling into tiles to prevent leaks and damage. SIC Solar tile mounting systems offer customized brackets and hooks for a secure, non-intrusive installation.

    Ensure Proper Waterproofing
    All mounting penetrations should be sealed with flashing and waterproof membranes to protect against leaks.

    Handle Tiles with Care
    Tiles can be fragile, so walk cautiously on the roof and use proper lifting techniques to avoid breakage.

    Consider Roof Maintenance Access
    Ensure the layout allows easy access for future roof maintenance or panel servicing.

    solar panel tiled roof brackets

    Installing solar panels on a tiled roof requires the right mounting system, careful handling, and proper waterproofing. SIC Solar provides high-quality tile roof solar mounting solutions that ensure a secure and long-lasting installation. Contact us today to find the best solar mounting system for your tiled roof!

  • How Do You Fasten Solar Panels on an RV?

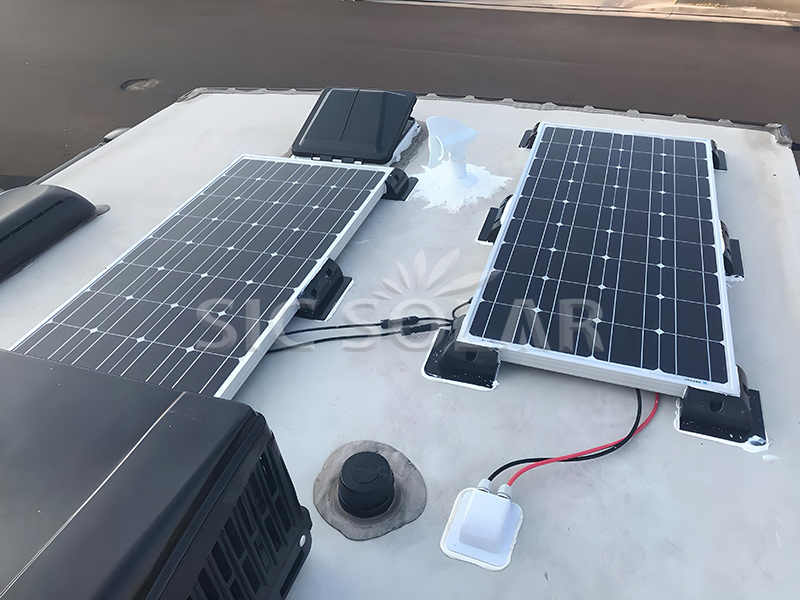
    Solar power is a game-changer for RV owners who want to enjoy off-grid adventures while keeping their essential appliances running. Installing solar panels on an RV allows travelers to harness renewable energy, reducing their reliance on noisy generators or campsite electrical hookups. However, proper installation is key to ensuring safety, efficiency, and longevity. In this guide, we’ll discuss how to securely fasten solar panels on an RV, along with some important considerations for a successful setup.

    Rv Rooftop Solar Panels

    Step 1: Choosing the Right Solar Panels and Mounting System

    Before installation, it’s important to choose the right solar panels and mounting system for your RV. Panels come in two main types:

    • Rigid solar panels – These are durable and efficient but require proper mounting to ensure stability while driving.
    • Flexible solar panels – These are lightweight and can conform to curved RV roofs, making installation easier, but they may have a shorter lifespan.

    For a secure and reliable setup, SIC Solar offers durable mounting brackets designed to withstand road vibrations and weather conditions, ensuring that the panels remain in place even during long trips.

    Step 2: Selecting the Mounting Method

    There are multiple ways to fasten solar panels on an RV, depending on the roof type and personal preference:

    1. Bracket Mounting (Drill Method)

    This is the most secure way to attach solar panels and is ideal for rigid solar panels. Here’s how:

    • Mark the mounting locations – Position the panels on the roof and mark where the brackets will be attached.
    • Drill pilot holes – Use a drill to create holes for the mounting screws.
    • Apply sealant – Before screwing in the brackets, apply a waterproof sealant to prevent leaks.
    • Secure the panels – Attach the brackets with stainless steel screws and tighten them securely.

    Pros: Very secure, long-lasting
    Cons: Requires drilling, potential risk of roof leaks if not properly sealed

    2. Adhesive Mounting (No-Drill Method)

    For RV owners who want to avoid drilling, using adhesive mounting brackets is an alternative:

    • Clean the roof surface – Remove dirt and grease to ensure a strong bond.
    • Apply adhesive – Use a high-strength adhesive (such as VHB tape or solar panel mounting glue) on the back of the mounting brackets.
    • Press and hold – Firmly press the panel brackets onto the roof and let them cure as per the adhesive instructions.

    Pros: No drilling required, easy installation
    Cons: Less durable than bracket mounting, may not hold up in extreme weather

    3. Tilt Mounting (For Maximum Efficiency)

    Tilt mounting allows panels to be angled for better sunlight absorption, which is particularly useful in winter when the sun is lower in the sky. Adjustable tilt mounts, like those from SIC Solar, provide flexibility in positioning for optimal energy capture.

    Pros: Increased energy efficiency
    Cons: Requires manual adjustment, adds height to the RV

    Step 3: Wiring the Solar Panels

    Once the panels are securely fastened, it’s time to wire them:

    1. Run the cables – Route the solar cables through the roof (using a weatherproof cable entry gland) and down to the charge controller.
    2. Connect the charge controller – The charge controller regulates the power from the solar panels to prevent overcharging the batteries.
    3. Wire the battery – Connect the charge controller to the RV’s battery system.
    4. Test the system – Turn on the system and monitor the voltage to ensure the panels are charging the batteries correctly.

    Step 4: Maintenance and Safety Checks

    To ensure your solar panels stay secure and functional:

    • Inspect the mounts regularly for loose screws or adhesive wear.
    • Clean the panels periodically to remove dust, dirt, and bird droppings.
    • Check wiring connections to prevent power loss or short circuits.

    Installing solar panels on an RV requires careful planning and the right mounting approach to ensure long-term performance. Whether using bracket mounts, adhesive mounts, or tilt mounts, it’s essential to secure the panels properly to withstand road vibrations and harsh weather conditions. SIC Solar provides reliable solar mounting solutions that make installation easier and more durable, helping RV owners enjoy efficient and sustainable energy on their journeys.

  • How Many Solar Panels Do I Need for a Carport?

    Solar carports are an efficient way to generate renewable energy while providing shade and protection for vehicles. They are particularly useful for residential homes, commercial spaces, and parking lots. If you’re considering installing a solar carport, one of the key questions is: how many solar panels do you need?

    Factors That Determine the Number of Solar Panels

    The number of solar panels required for a carport depends on several factors, including:

    1. Energy Consumption Needs

    The first step is to determine how much electricity you want the solar carport to generate. For example:

    • A typical home consumes 900–1,200 kWh per month.
    • An electric vehicle (EV) may require 250–500 kWh per month for charging.
    • A small business with multiple parking spots may need significantly more energy.

    The more energy you need, the more solar panels your carport will require.

    2. Solar Panel Wattage

    Different solar panels have varying power outputs, typically ranging from 300W to 600W per panel. Higher-wattage panels generate more electricity, meaning you will need fewer panels to meet your energy goals.

    3. Available Space on the Carport

    The size of your carport determines how many panels you can fit. Common carport sizes include:

    • Single-car carport (~12-15 feet wide): Can typically fit 6-8 solar panels.
    • Double-car carport (~18-20 feet wide): Can accommodate 12-16 solar panels.
    • Larger commercial carports: Can hold dozens to hundreds of solar panels, depending on the structure.

    4. Sunlight Exposure

    The efficiency of your solar carport depends on how much sunlight it receives. Locations with more direct sunlight require fewer panels to generate the same amount of energy as areas with frequent cloud cover.

    Example Calculation

    Let’s say you want to generate 1,000 kWh per month, and you choose 400W solar panels. Assuming 5 hours of peak sunlight per day, the energy output per panel would be:


    2 \text{ kWh/day} \times 30 \text{ days} = 60 \text{ kWh per month per panel}

    1,000 \text{ kWh} \div 60 \text{ kWh per panel} = \text{about 17 panels}

    So, you would need approximately 17 solar panels to meet this energy goal.

    Choosing the Right Solar Carport Mounting System

    Selecting a durable and efficient solar mounting structure is essential for the longevity and performance of your carport. SIC Solar provides high-quality solar carport mounting systems that are:
    ✔ Made from strong aluminum and steel for durability.
    ✔ Designed for easy installation and scalability.
    ✔ Engineered to withstand wind, snow, and other environmental factors.

    carport ground solar mounting system

    The number of solar panels needed for a carport depends on energy consumption, panel efficiency, carport size, and sunlight availability. For a standard home with moderate energy use, a double-car solar carport with 12-16 panels is typically sufficient.

    If you’re looking for a reliable and efficient solar carport mounting system, SIC Solar offers customizable solutions to fit residential and commercial projects. Contact us today to explore the best options for your solar carport installation!