• Can we Keep an Inverter in the Balcony?


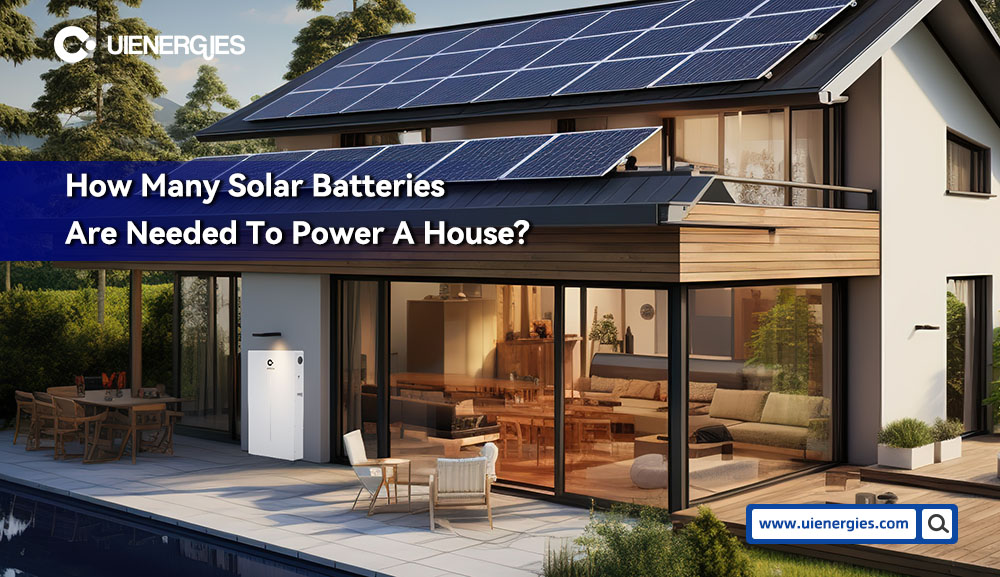
    When setting up a solar energy system, one common question that arises is whether it’s possible to keep an inverter on the balcony. For those living in apartments or homes without rooftop access, the balcony can be a convenient spot for installing solar panels and the accompanying inverter. However, there are important factors to consider to ensure safety, efficiency, and longevity of the inverter.


    In this blog post, we’ll explore whether keeping an inverter in the balcony is feasible and what to keep in mind when selecting the right equipment for such an installation. We’ll also touch on the benefits of using a 600W IP67 Micro Inverter, 800W micro inverter, and considerations when sourcing products from balcony micro inverter manufacturers.


    Factors to Consider When Placing an Inverter on the Balcony

    1. Weather Resistance

    The most crucial factor to consider is whether the inverter can withstand the outdoor elements. The balcony is often exposed to rain, humidity, dust, and direct sunlight. Many inverters are not designed for such conditions, so it’s important to choose a weatherproof model. This is where the 600W IP67 Micro Inverter comes in handy. The IP67 rating indicates that the inverter is both waterproof and dustproof, making it ideal for outdoor installations like a balcony.


    IP67-rated micro inverters can handle temporary submersion in water and complete protection from dust, ensuring they remain functional even in rainy or dusty environments. This level of protection is essential for extending the lifespan of the inverter, especially in climates with extreme weather conditions.


    2. Ventilation

    Inverters can generate heat while they are in use. Proper ventilation is necessary to avoid overheating, which can decrease the inverter's efficiency and potentially cause damage. When placing an inverter on a balcony, make sure there is adequate airflow around the device. Avoid placing it in enclosed or cramped spaces without airflow, such as behind large objects or in tight corners.


    Additionally, balcony setups should ensure that the inverter isn’t exposed to direct sunlight for extended periods. Prolonged exposure to intense heat can reduce its efficiency and damage internal components over time.


    3. Safety Concerns

    Electrical safety is another key concern. Inverters handle high-voltage electricity, so they should be mounted securely, away from areas where children or pets could accidentally tamper with them. Make sure the inverter is installed on a sturdy surface and positioned in a place where it’s not likely to be knocked over or disturbed.


    Best Inverter Options for Balcony Installations

    When it comes to balcony installations, micro inverters are a popular choice due to their compact size, easy setup, and ability to manage individual solar panels. Let’s take a look at two common micro inverter models that are well-suited for balcony installations.


    600W IP67 Micro Inverter

    As mentioned earlier, the 600W IP67 Micro Inverter is designed for outdoor use, making it ideal for balconies. It can handle two solar panels, typically 300W each, and is built to be resistant to dust and water. This is crucial for balconies that may be exposed to the elements. Additionally, this model is compact, easy to install, and can work well in smaller spaces.


    800W Micro Inverter

    For those looking to increase their solar energy generation, the 800W micro inverter is another excellent option. It can handle higher power loads, making it suitable for larger solar panels or systems with more energy needs. While it doesn’t have the same IP67 rating as the 600W model, it’s still compact and efficient, and many models come with protective housings that can safeguard against the elements. This inverter is ideal if you want to make the most of a small balcony setup by maximizing energy output.

    IP67 Micro Inverter Single Phase

    Choosing a Balcony Micro Inverter Manufacturer

    When selecting a micro inverter for your balcony, it’s important to choose a reliable manufacturer that provides products specifically designed for outdoor environments. Many balcony micro inverter manufacturers offer a range of products with weatherproof features, making them suitable for outdoor use.


    When evaluating manufacturers, consider the following:


    Durability and Weatherproofing: Ensure the product can handle outdoor conditions.

    Efficiency Ratings: High-efficiency inverters can help maximize energy output even in limited spaces.

    Warranty and Support: Look for manufacturers that offer strong warranties and customer support, as this can be a critical factor in maintaining your system over time.


    So, can you keep an inverter in the balcony? Yes, you can, provided you select the right model and take appropriate precautions. Using a 600W IP67 Micro Inverter ensures protection against dust and water, making it a perfect option for balcony installations. For those with higher power needs, the 800W micro inverter can help maximize your energy harvest from the limited space of a balcony.

    When selecting equipment, it’s essential to choose reliable balcony micro inverter manufacturers that offer products specifically designed for outdoor environments. With the right inverter, your balcony can be transformed into an efficient and sustainable energy source for your home.


  • What is an off grid inverter

    In an age where energy independence is increasingly sought after, the Residential Off-Grid Inverter has become a cornerstone for homeowners looking to break free from conventional power sources. This technology allows users to harness renewable energy—like solar or wind—storing it for use when the sun isn't shining or the wind isn't blowing. Off-grid systems not only reduce electricity bills but also offer a reliable solution in remote locations where grid access is limited.


    When considering an off-grid setup, many homeowners opt for a Single Phase Off-Grid Inverter. These inverters are specifically designed to convert the direct current (DC) generated by solar panels into alternating current (AC), which is essential for powering household appliances. Their simplicity and efficiency make them ideal for smaller homes or cabins that require less power.


    For those looking for a seamless integration of energy independence and household needs, the Residential Single Phase Off-Grid Inverter is the ultimate choice. This inverter not only ensures that your home runs smoothly on renewable energy but also provides essential features like battery management systems and load management capabilities. By investing in this technology, homeowners can significantly enhance their energy resilience while contributing to a more sustainable future.


    In conclusion, off-grid inverters are more than just power solutions; they represent a lifestyle choice aimed at sustainability and self-sufficiency. As more people recognize the benefits of going off-grid, technologies like the Residential Off-Grid Inverter and its single-phase counterpart will continue to play a vital role in transforming how we think about energy consumption. Embracing this change not only empowers individuals but also contributes positively to our planet.


    Gospower residential single phase off-grid inverter is a perfect design for home- installation with its compact size and quick setting. Gospower inverter is a good option for your household system. 

    Residential Single Phase Off-Grid Inverter


  • Tips and Tricks for High-Quality 100W Solar Outdoor Floodlights Making Your Garden Shine!

    Are you a solar flood light enthusiast looking to brighten up your garden without increasing your electricity bills? Look no further! In this blog post, we will share some valuable tips and tricks to help you choose, install, and maintain high-quality 100W solar outdoor floodlights, ensuring a radiant and energy-efficient garden.

    1. Determine your lighting needs

    Before purchasing solar floodlights, assess your lighting requirements. Consider the size of your garden and the areas you want to illuminate. This will help you select the appropriate number and placement of floodlights for optimal coverage.

    2. Look for high-quality and waterproof options

    Investing in high-quality and waterproof floodlights is crucial for durability and performance. Opt for models with IP65 or higher ratings, ensuring they can withstand various weather conditions.

    3. Choose energy-efficient LED lights

    LED lights are known for their energy efficiency and longevity. Select 100W solar floodlights with LEDs that have a high lumen output to maximize brightness and create a captivating ambiance in your garden.

    4. Position the solar panel strategically

    To harness the maximum amount of sunlight, position the solar panel in an area where it can receive direct sunlight throughout the day. Ensure there are no obstructions such as trees, buildings, or other structures that may cast shadows on the panel.

    5. Optimize solar panel angle and orientation

    Adjust the angle and orientation of the solar panel to align it with the sun’s movement. For optimal energy absorption, tilt the panel towards the equator at an angle equal to your location’s latitude. Regularly clean the panel to remove dust and debris that may impede its efficiency.

    6. Install at the correct height and angle

    When installing the floodlights, ensure they are positioned at an appropriate height and angle for maximum coverage. Aim the lights towards the areas you want to illuminate, while considering the spread and reach of the light beams.

    7. Utilize motion sensors

    To enhance energy efficiency and security, choose solar floodlights with built-in motion sensors. This feature allows the lights to only activate when movement is detected, saving electricity and acting as a deterrent for unwanted visitors.

    8. Regularly clean and maintain the lights

    Keep your solar floodlights in optimal condition by regularly cleaning the solar panel and light fixture. Remove any debris, dirt, or dust that may reduce their charging capability or obstruct the light output. Check for any loose connections or damaged parts and repair or replace them promptly.

    9. Monitor and adjust lighting settings

    Some solar floodlights offer adjustable lighting settings, allowing you to control the brightness or duration of illumination. Experiment with different settings to find the right balance between ambiance and energy conservation.

    10. Consider backup charging options

    During prolonged periods of cloudy weather, backup charging options such as a wired connection or removable battery can ensure your floodlights continue to function. Check if your chosen floodlights offer these options to guarantee continuous lighting.

    With these tips and tricks in mind, you are now equipped to choose and maintain high-quality 100W solar outdoor floodlights. Transform your garden into a dazzling oasis while contributing to a sustainable future. Happy lighting!

  • Solar Ground Screw

    Solar Ground Screw

    It’s the best choice for someone to use ground screw to install the ground solar  mounting systems when the foundation is sand with clay.


    Ground screw is effective foundation for ground mounted structure,it supply quick and easy constructions on stable foundation and make construction immediately.


    We can supply various kinds of ground screws for the client,it is galvanized with high anti-corrosion and great,We design the ground screw with various helix for different soils to ensure safety of installation.


    ★How to install the ground screws ‌easily?


    1.You can use the pile driver to install the ground screws,Please refer to the installation video:

    https://www.youtube.com/watch?v=BYV97tdp4UM


    You can rent a pile driver in local,then put the machine adapter in the pile driver to install the ground screws.it’s easy to install.


    2.you can also use a portable driveto install the ground screws.


    If you are interested in more detail information,please contact to us!

    Email:sales9@landpowersolar.com


  • Carport Mounting Systems

    Carport Mounting Systems

    More and more people interesting in the carport mounting systems.

    Our company Landpower solar keeps aluminium carport structure and steel carport structure,designed for bothresidentialand commercial installation,and waterproof design option.


    Let me show you the two kinds of carport mounting systems:


    1. Aluminium carport structure

    Feature:

    1)Material:Anodized Aluminium

    2)Finishing:Anodized

    3)Max Wind Load:46m/s

    4)Tilt Angle:0-45°

    5)Solar Orientation:Landscape or Portrait

    6)Corrosion-Resistant


    2. Steel carport structure

    Feature:

    1)Material:Steel Q235

    2)Finishing:Hot galvanized

    3)Max Wind Load:46m/s

    4)Tilt Angle:0-45°

    5)Solar Orientation:Landscape or Portrait

    6)Corrosion-Resistant

    7)Maximize Parking Space


    ▲Different of the two kinds structure:

    1. The cost of aluminium carport structure is lower than the steel carport structure.

    2. The volume of the steel carport structure is larger than the aluminium carport structure.

    3. The maximize parking space of the steel carport structure is bigger than the aluminium carport structure.


    No matter what structure you are interesting in,we will provide good design and price for you.


    Email:sales9@landpowersolar.com


  • Solar PV Mounting Roof Hook

    The solar panel roof hook is an important part of the solar photovoltaic module system. It is used to secure and support the solar panels, ensuring their stable installation on the roof. At the same time, it can adapt to the needs of different roof structures and improve the installation efficiency and stability of solar panels.

    This roof hook for tile roofs is one of the solar panel roof hook products. Its base model comes with 1 bolt, 1 Tmodule and 3 screws. It can also be made adjustable. Pantile Adjustable Roof Hook is flexible in adjustment both in height and width, Pantile adjustable roof hook is flexible in adjustment both in height and width, two individual adjustable part in height and one in width, which make them work in various pantile roof. And the material of the roof hook is sus304, equivalent to 1.4301 stainless steel. If you have the need, we can also customize this product according to your requirements.

    SUS roof hooks have the following features:
    1. Easy to install
    2. High durability
    3. Protect against extreme weather

    4. Wide applicability

    If you are interested in this kind of roof hook, please feel free to contact us. (sales7@landpowersolar.com)

  • How to Install Solar Lights in Shaded Areas

    Solar lights are a great way to light up our garden or walkway, but it can be a challenge to install them in shaded areas. Without enough direct exposure of sunlight, their performance can suffer. While don’t worry, installing solar powered outdoor lights in shaded areas isn’t impossible, it just requires a little extra planning and creativity.


    Let’s talk about the basics. Solar lamps rely on sunlight to charge during the day, so ideally, they should be placed in direct sunlight. But if we have a shaded area, look for solar lights that come with separate solar panels is a good choice. These solar split lights allow us to place the solar panel in a sunny spot, while the light fixture itself can be positioned in the shade where we need illumination. The solar panel is connected to the light by a cable, which can often be extended to reach the optimal charging location. When selecting this type of light, it is important to check the length of the cord to make sure it’s long enough to reach from the sunny area to the shaded location. This setup allows us to maximize sunlight exposure for charging, while still lighting up shaded spaces.


    Investing in highly efficient outdoor solar lighting is an additional choice. Even if our yard doesn’t receive a lot of direct sunlight, LED lights can still perform admirably because some more recent models are made to be efficient even in dim light or overcast weather. But remember that they may not be as bright or persist into the night as they would in places with full sunlight. For areas with consistent shade, we can also look into some solar lights with rechargeable or hybrid battery systems. Some models allow us to charge the batteries using electricity or a USB port during cloudy day or in the winter, ensuring we have light no matter the conditions.


    solar split lights 

    When installing solar lights in shaded areas, strategic placement can make all the difference. Instead of placing the lights directly in dense shade, try positioning them in spots that get at least partial sunlight for part of the day, such as under trees with thinner branches or near the edge of a shaded area where some sunlight filters through. We should also consider reflective surfaces nearby, like white walls or metal fences, which help bounce light onto the solar panels.


    At last, we need remember to routinely inspect and clean our solar panels. Debris like dust or leaves can obstruct the sunlight that the panels are attempting to capture, even in regions that are shadowed. Even when the sun isn’t shining directly on them, keeping the clean guarantees that they can charge as effectively as possible and provides us with the best outcomes.

  • Comparing and Contrasting Outdoor Solar Spotlights Finding the Perfect Choice for Your Lawn

    Outdoor solar spotlights are an excellent choice for illuminating your outdoor spaces while minimizing energy consumption. With various options available in the market, it can be challenging to pick the right one for your needs. In this article, we will compare and contrast different products and services related to outdoor solar spotlights, solar-powered lawn lamps, solar grass outdoor spotlights, solar spotlights, solar spotlights for grass, and LED solar spotlights, helping you make an informed decision.

    1. Solar Powered Lawn Lamps

    Solar-powered lawn lamps are an eco-friendly and convenient way to brighten up your lawn or garden. These lamps absorb sunlight during the day and store energy in batteries, illuminating your outdoor space at night. One notable advantage of solar-powered lawn lamps is their easy installation, as they don’t require any complicated wiring. Moreover, they are often equipped with light sensors that automatically switch them on and off, saving energy and ensuring continuous light throughout the night.

    2. Solar Grass Outdoor Spotlights

    Solar grass outdoor spotlights are designed specifically for illuminating grassy areas. These spotlights are equipped with spikes that can be easily inserted into the ground, making them perfect for highlighting walkways, gardens, or specific features in your yard. The advantage of using solar grass outdoor spotlights is that they are discreet and blend well with the surrounding landscape while providing a soft and ambient glow.

    3. LED Solar Spot Lights

    LED solar spot lights offer a brighter and more focused light than traditional solar spotlights. These lights utilize Light Emitting Diodes (LEDs) as their light source, resulting in a higher intensity of light. LED solar spotlights are ideal for illuminating specific objects, such as statues, trees, or architectural elements, with enhanced clarity and precision.

    Which One Should You Choose?

    The choice between solar-powered lawn lamps, solar grass outdoor spotlights, and LED solar spot lights ultimately depends on your specific lighting requirements and the desired effect you want to achieve in your outdoor space.

    If you have a larger lawn or garden to illuminate, solar-powered lawn lamps are a suitable option as they provide a broader range of light. They are also perfect if you prefer a hassle-free installation process and automated lighting.

    For highlighting specific areas or creating an enchanting ambiance in your garden, solar grass outdoor spotlights can beautifully blend with your surroundings. These spotlights work well for creating pathways or accentuating key landscape features.

    On the other hand, if you aim to showcase particular objects or architectural elements, LED solar spot lights offer a more focused and bright illumination. Their precision and intensity make them ideal for spotlighting unique elements and adding a touch of elegance to your outdoor space.

    In conclusion, outdoor solar spotlights offer an energy-efficient and environmentally-friendly solution to illuminate your outdoor areas. Whether you opt for solar-powered lawn lamps, solar grass outdoor spotlights, or LED solar spot lights, each option brings unique benefits to suit your specific lighting needs. Assess your requirements, consider the aesthetics, and choose the option that enhances your outdoor space while minimizing your energy consumption.

  • A Beginner's Guide to Using Adjustable Aluminium Tile Roof Hook Solar Mounting

    Solar energy is becoming increasingly popular as a cost-effective and environmentally friendly way to generate electricity. Installing solar panels on your roof is a great investment, and with the right mounting system, it can be a straightforward process. In this beginner’s guide, we will walk you through the step-by-step process of using adjustable aluminium tile roof hook solar mounting.

    Step 1: Safety First

    Before starting any installation, safety should be your top priority. Make sure you have the necessary safety equipment, such as gloves, safety glasses, and a sturdy ladder. Always work with caution and consult a professional if you have any concerns.

    Step 2: Assess Your Roof

    Begin by assessing your roof and determining its suitability for solar panel installation. Ensure that your roof is in good condition, with no loose or damaged tiles. It’s also essential to check for any shading that could impact the efficiency of your solar panels.

    Step 3: Gather the Required Materials

    To install adjustable aluminium tile roof hook solar mounting, you will need the following materials:

    • Adjustable aluminium roof hooks

    • Solar panel mounting brackets

    • Stainless steel hardware

    • Drill with metal drill bits

    • Measuring tape

    • Silicone sealant

    Step 4: Proper Placement of Roof Hooks

    Start by identifying the optimal location for your solar panels. Once determined, position the roof hooks on your roof tiles accordingly. Ensure that the hooks are aligned properly and securely fastened. Keep a suitable distance between each hook to provide adequate support for your solar panels.

    Step 5: Attach the Mounting Brackets

    After positioning the roof hooks, you can now attach the solar panel mounting brackets. Secure the brackets onto the hooks using the provided stainless steel hardware. Ensure that the brackets are level and tightly fastened to provide a stable foundation for your solar panels.

    Step 6: Install the Solar Panels

    With the roof hooks and mounting brackets in place, it’s time to install your solar panels. Carefully lift each solar panel and align it with the mounting brackets. Attach the panels firmly and securely using the provided hardware. Double-check that each panel is properly aligned and positioned.

    Step 7: Seal the Tile Roof

    To prevent any water leakage, apply silicone sealant around the roof hooks and mounting brackets. This will help create a watertight seal and protect your roof from potential damage.

    Step 8: Test and Inspect

    Once the installation is complete, it’s crucial to test and inspect your solar panel system. Check the connections, wiring, and ensure that everything is functioning correctly. If you’re unsure, consult a professional to verify the system’s performance and safety.

    In conclusion, installing adjustable aluminium tile roof hook solar mounting is a manageable task when following a step-by-step approach. Remember to prioritize safety, assess your roof, gather the necessary materials, properly position the roof hooks and mounting brackets, install the solar panels securely, seal the tile roof, and thoroughly test and inspect the system. By doing so, you’ll be well on your way to harnessing the power of the sun and enjoying the benefits of solar energy.

  • Solar Street Lights Comparing the Best Options for Quality and Efficiency

    When it comes to outdoor lighting solutions, solar street lights have gained significant popularity due to their energy efficiency and cost-effectiveness. In this article, we will compare and contrast different products and services related to solar street lights, LED lights, and all-in-one street lights. Whether you’re looking for a reliable 100W solar street light or a versatile outdoor light, we have you covered.

    Solar Street Lights

    Solar street lights harness the power of the sun to provide illumination during the night. They eliminate the need for traditional electrical connections, making them environmentally friendly and cost-effective in the long run. Here, we’ll explore some standout options for solar street lights, focusing on their features, performance, and reliability.

    All-in-One Street Lights

    All-in-one street lights are an excellent choice for those looking for easy installation and maintenance. These lights integrate the solar panel, battery, and LED light into a single unit, providing a hassle-free lighting solution. With no complex wiring required, all-in-one street lights are suitable for various applications and offer versatility in terms of placement.

    LED Lights

    LED lights are known for their energy efficiency and durability. Compared to traditional lighting technologies, LED lights consume significantly less energy while providing brighter and more uniform illumination. LED street lights offer excellent longevity, which reduces maintenance costs in the long term. These lights come in various wattages, including the popular 100W option that efficiently lights up large outdoor areas.

    The Best Solar Street Light for You

    To make an informed decision, consider the following factors:

    1. Brightness and Illumination: Look for solar street lights that provide sufficient brightness and wide-angle illumination, ensuring optimal visibility and safety.

    2. Battery Capacity and Efficiency: A high-capacity battery ensures consistent performance even during cloudy days. Opt for lights with efficient battery technology for extended lighting hours.

    3. Durability and Weather Resistance: As outdoor lighting, solar street lights should be built to withstand harsh weather conditions. Ensure that the lights are weatherproof and made of durable materials.

    4. Installation and Maintenance: Evaluate the installation process and ongoing maintenance requirements. All-in-one street lights usually have a simple installation process, while LED lights may require separate setups for the panel and fixture.

    5. Warranty and Customer Support: Check the warranty period and the availability of reliable customer support. A longer warranty provides peace of mind, and responsive customer service ensures prompt assistance if needed.

    By assessing these factors, you can find the ideal solar street light that meets your requirements in terms of efficiency, longevity, and budget.

    In conclusion, solar street lights, all-in-one street lights, and LED lights are all viable options for outdoor lighting. Consider the specific features and benefits offered by each product to find the perfect lighting solution for your needs. With the advances in solar technology and energy-efficient LED lighting, you can now contribute to a greener future while enjoying reliable and high-quality illumination in your outdoor spaces.