Flexible Solar Mounting Systems Empower Fishery-photovoltaic Complementary Industry, Promote Eco-fishery Industry Upgrading
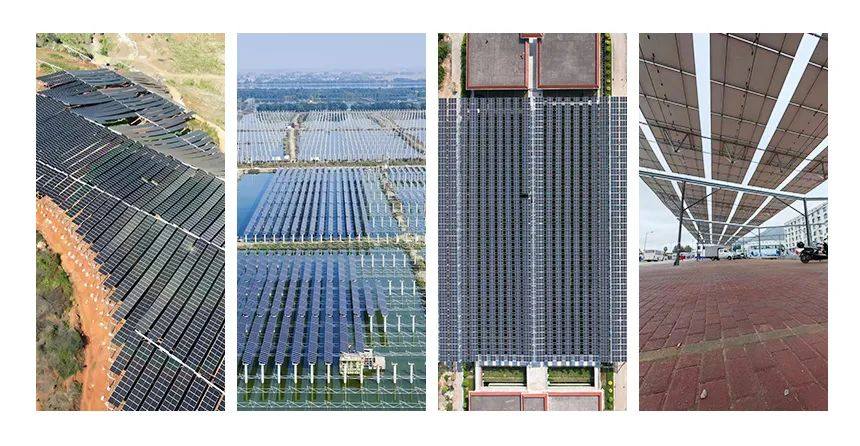
As ecological agriculture and clean energy converge, the application of flexible mounting systems in Fishery-photovoltaic Complementary Industry is becoming increasingly widespread. This innovative technology not only enhances the efficiency of fishery farming and photovoltaic power generation but also drives dual benefits, optimal land use and improved environmental protection.
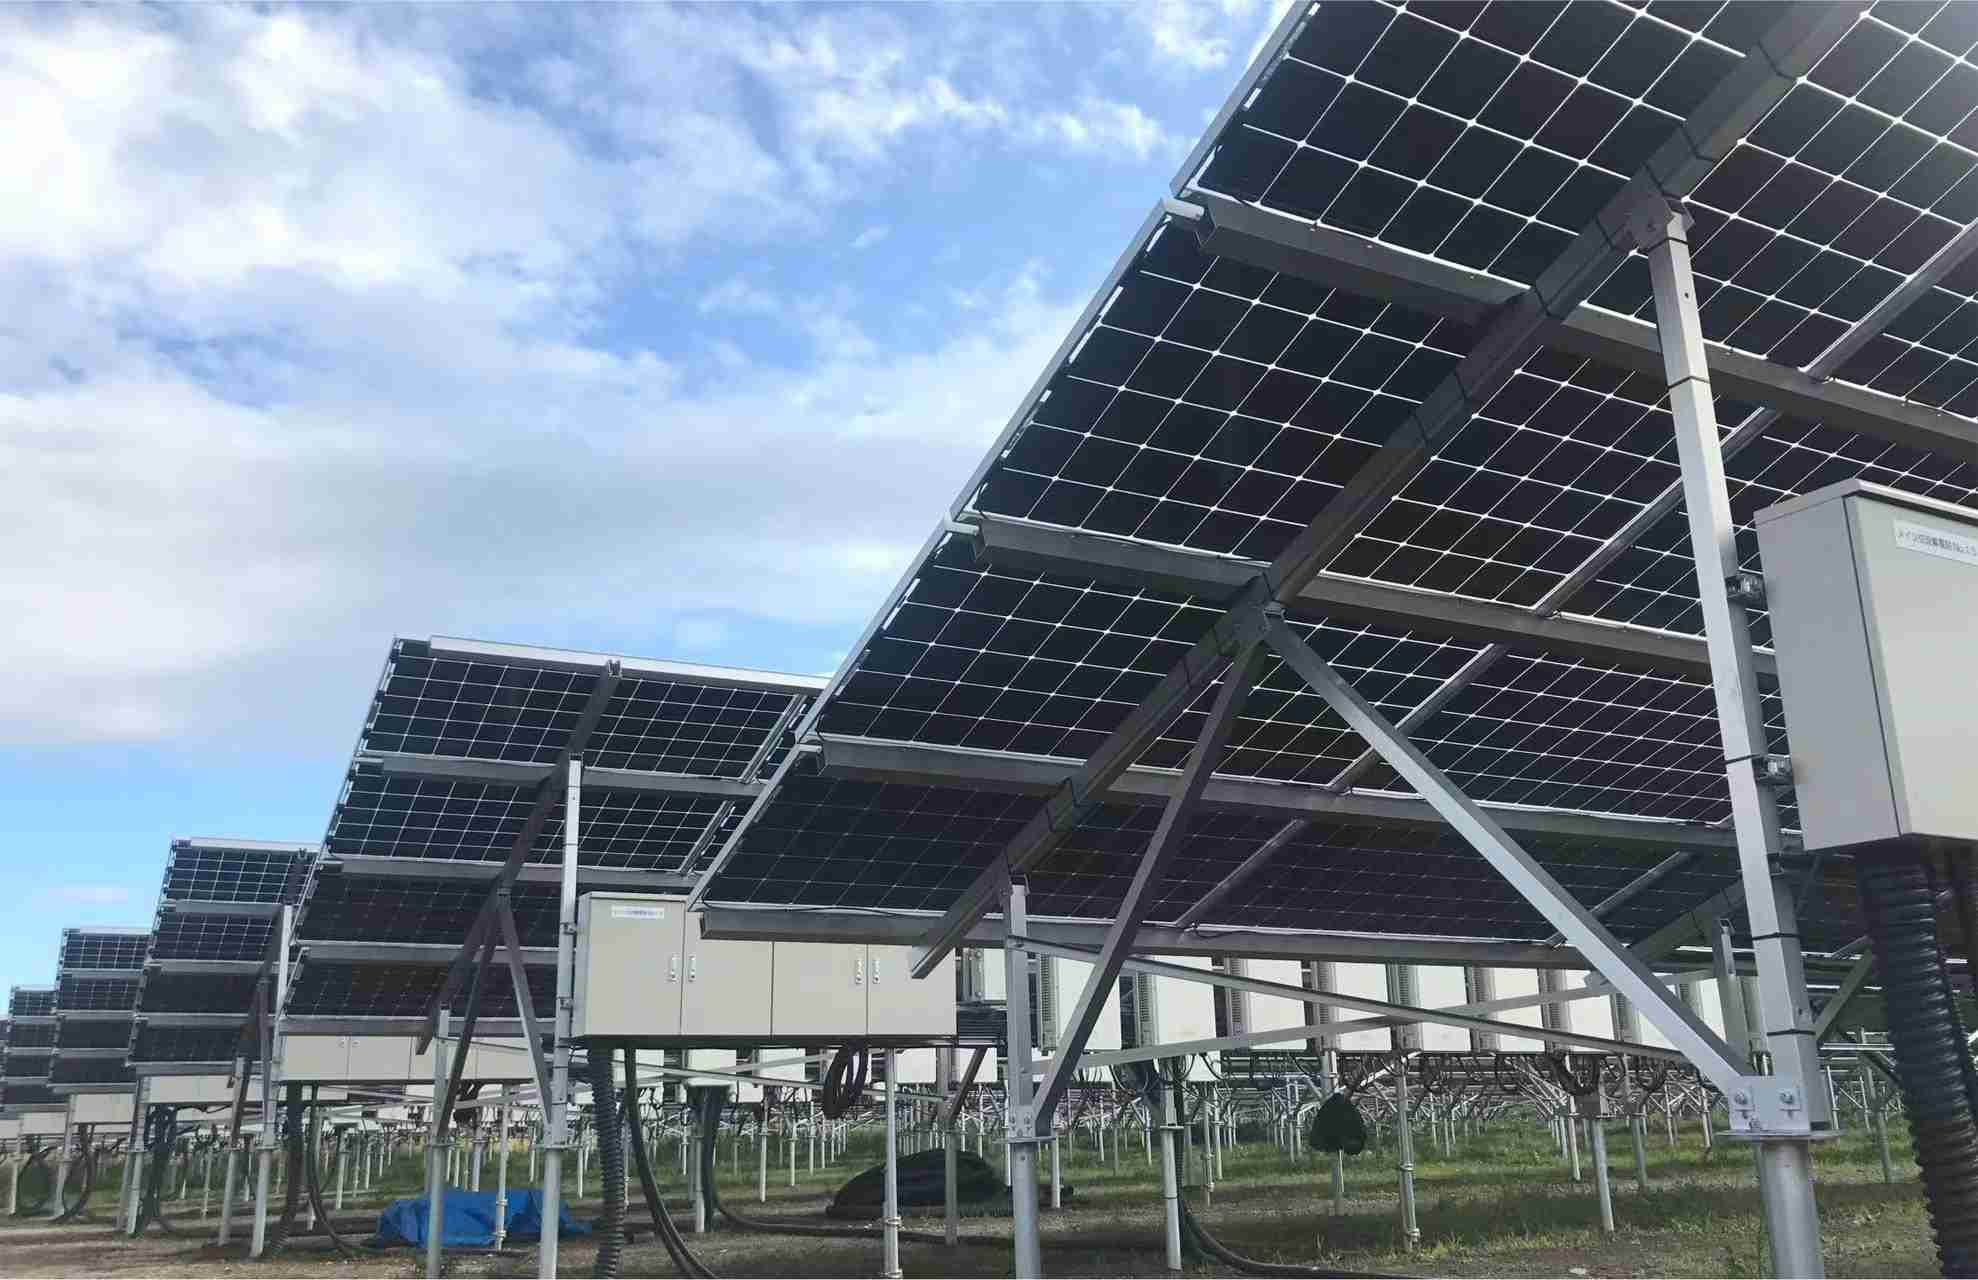
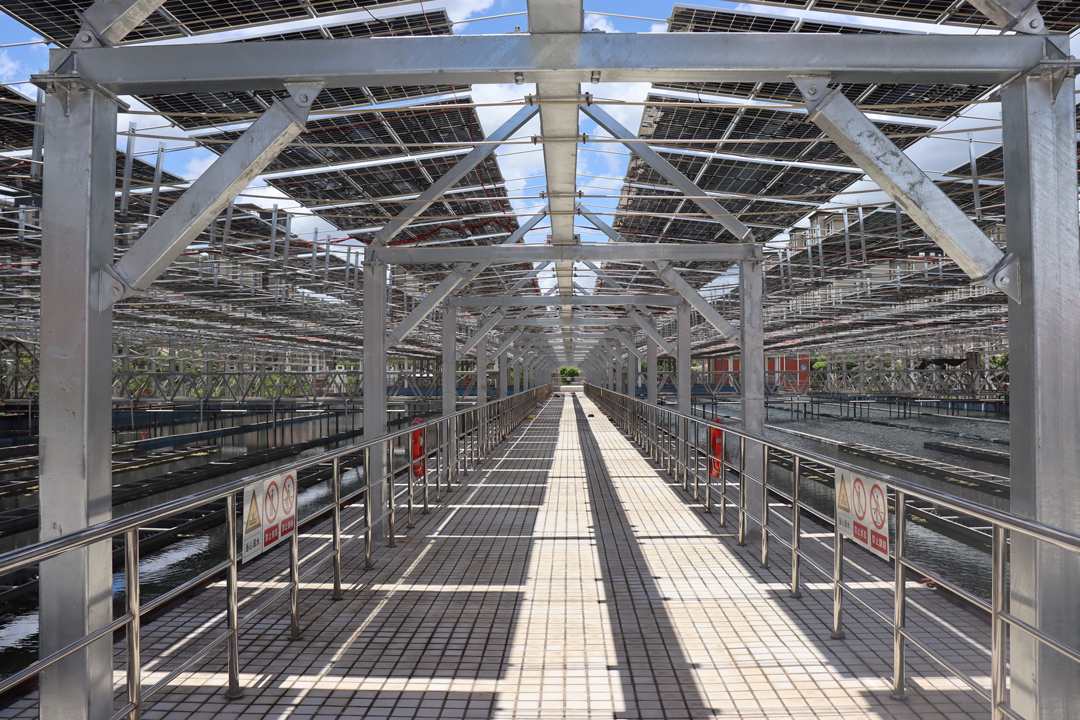
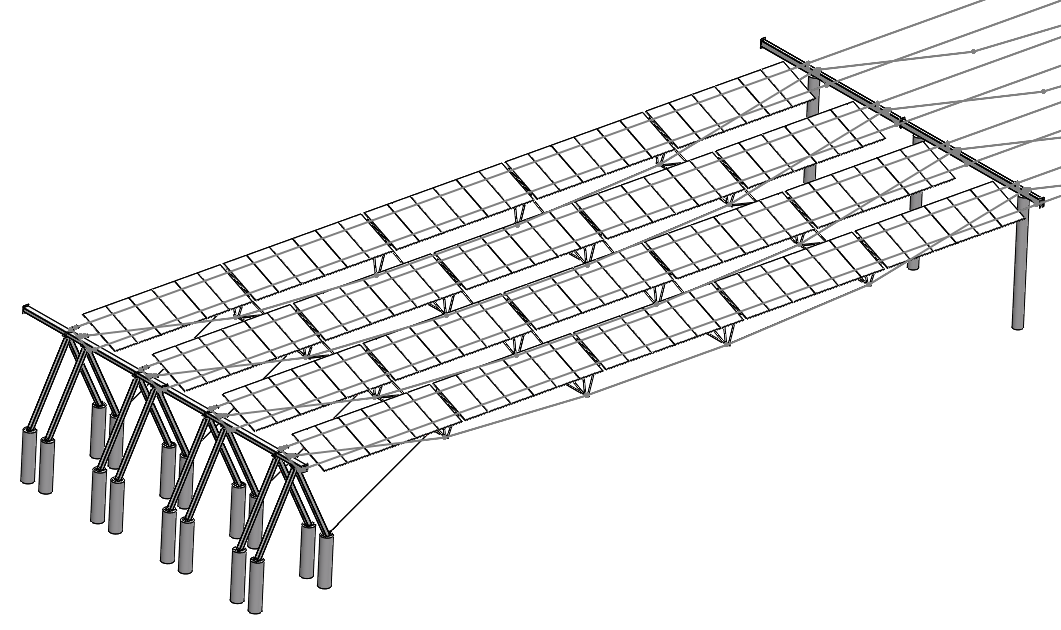
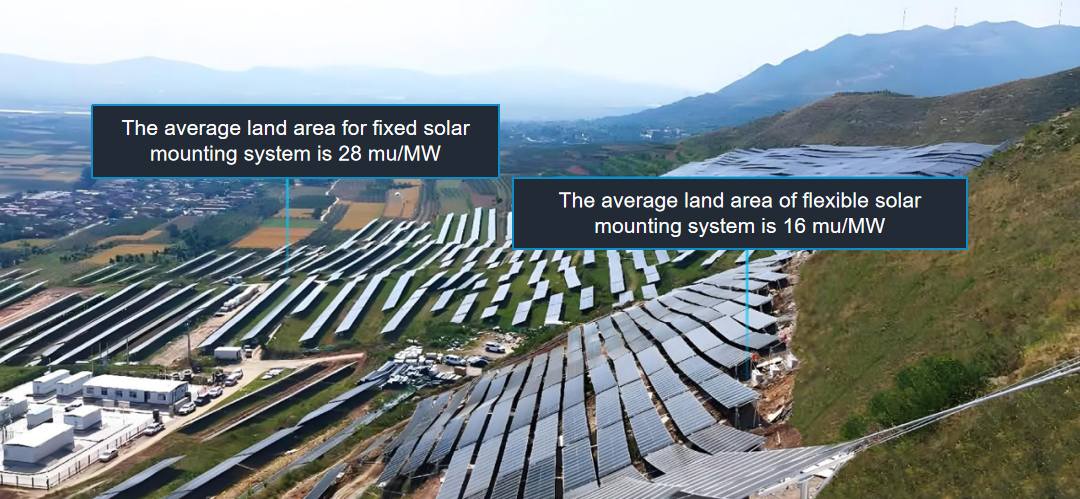
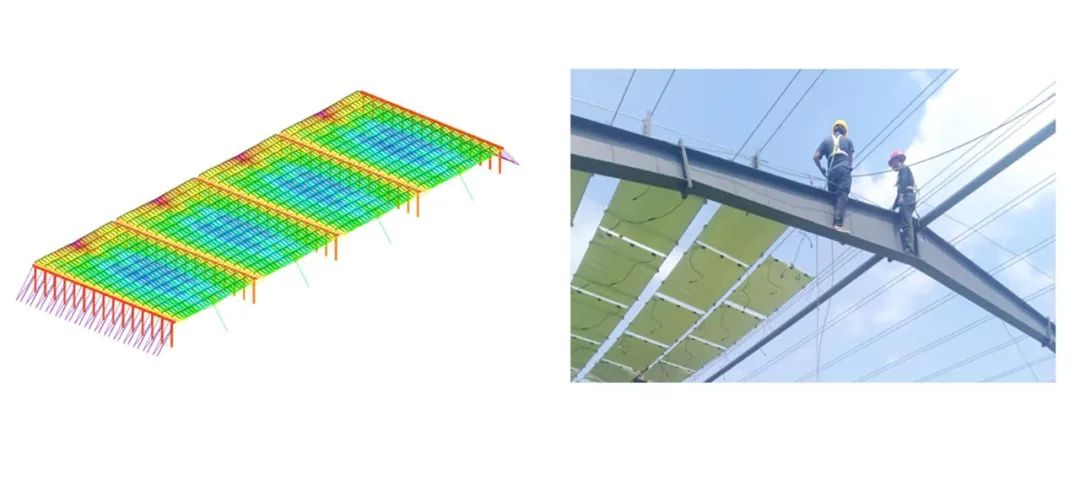
Traditional steel structure in fishponds will face problems such as difficult construction and easy to damage the aquaculture environment, while the flexible support prestressed cable truss structure is particularly suitable for large span applications similar to fishponds and ponds, with its excellent load bearing capacity and very small deflection. The structure features an overhead suspended cable design, eliminating traditional support column blocking. This reduces the number of foundation piles by up to 75%, significantly lowering construction costs and shortening the payback period.

The lightweight, flexible and durable corrosion-resistant nature of the flexible mounting system makes it adaptable to a variety of complex fishing environments. Through the adjustment of the flexible solar mounting system, it can shade and cool the aquaculture water body, ensure the circulation of water and oxygen supply, and effectively solve the problem of light, air and water circulation of the aquaculture water body. At the same time, it avoids water pollution, helps maintain the stability of water level and temperature in the fish pond, which creates favorable conditions for fish survival.
In the fishery-photovoltaic complementary project, the flexible solar mounting system can meet the sunlight demand for power generation and fishery by controlling the row spacing flexibly. The use of this structure significantly reduces the power consumption required for artificial oxygenation, which realizes effective energy saving. According to statistics, each acre of fish pond can output 40,000 to 60,000 kWh of electricity, saving 19.2 tons of standard coal per year and reducing carbon dioxide emissions more than 50 tons. Through self-sufficiency in photovoltaic power generation, the electricity cost of fishery farming has been reduced, and the deep integration of fishery farming and photovoltaic power generation has been achieved.
 In summary, the application of flexible solar mounting system has significant advantages and economic benefits in fishery-photovoltaic complementary Industry. It not only improve the efficient utilization of land resources, but also achieve value enhancement in fishery, electricity and environmental protection. As ecological agriculture and clean energy become increasingly integrated, the application of flexible solar mounting system will have a broader future in the fishery-photovoltaic complementary project. To get more information about photovoltaic industry, please follow Huge Energy!
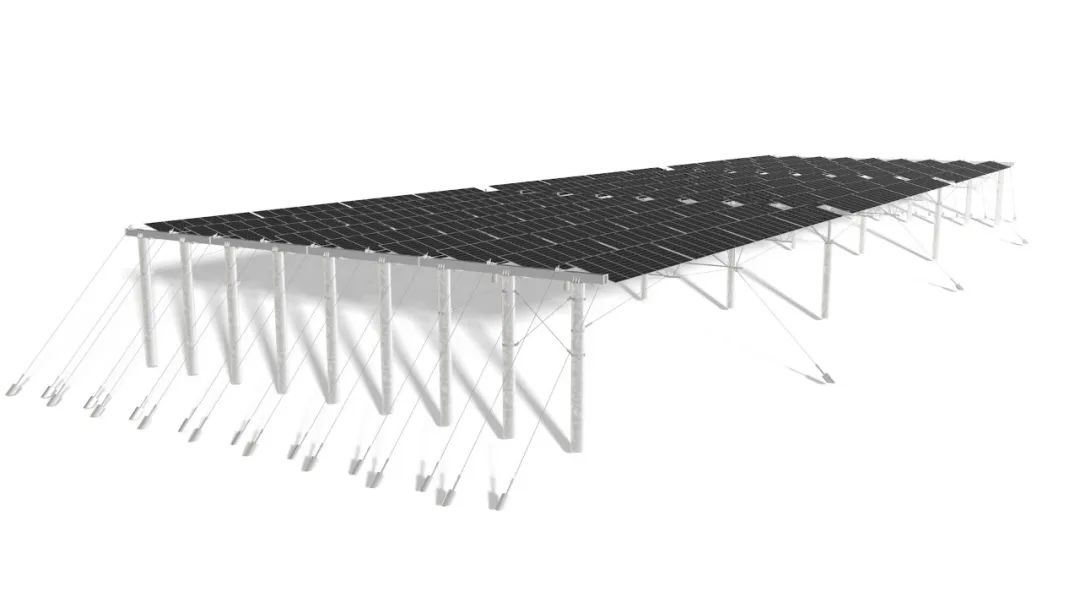
The Advantages of Huge Energy Flexible Solar Mounting System
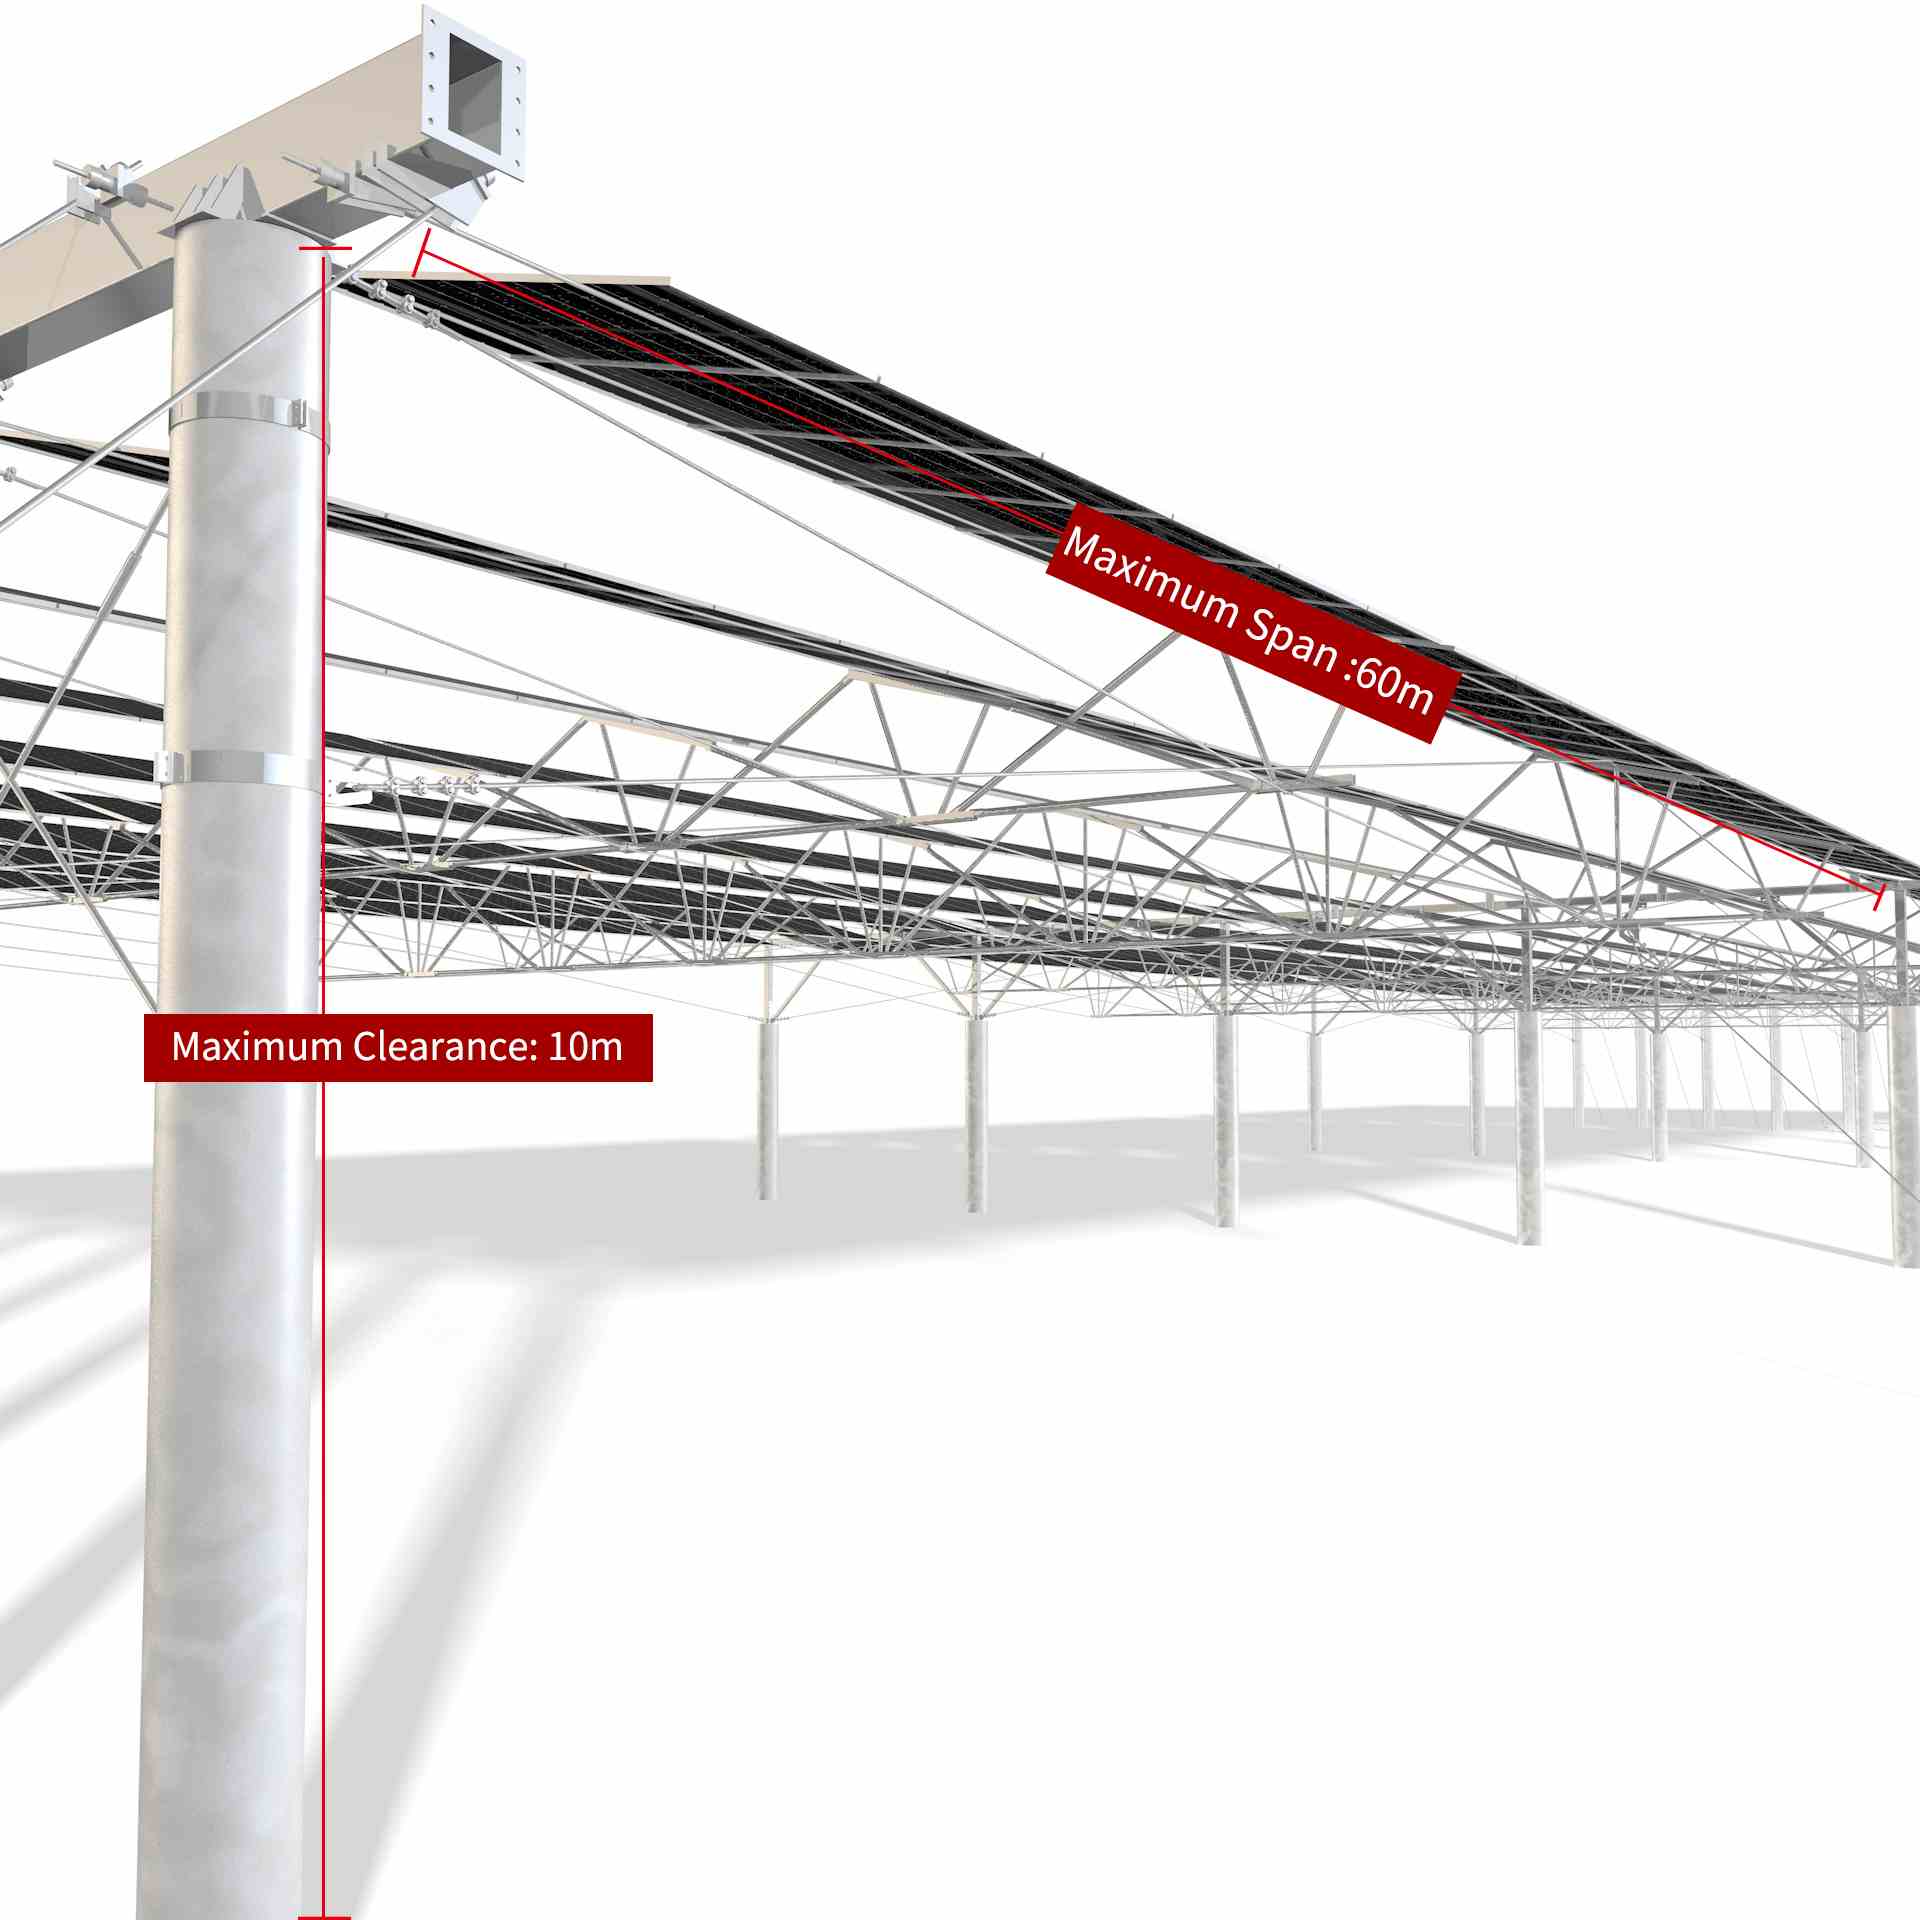
Huge Energy flexible solar mounting system offers a maximum clearance of 9 meters and a span of up to 50 meters. With its core advantages of high clearance, large span, and enhanced safety, it effectively addresses the issues of land occupation, limited reuse, and high construction costs associated with traditional solar mounts, driving the widespread adoption of 'PV+' comprehensive projects.
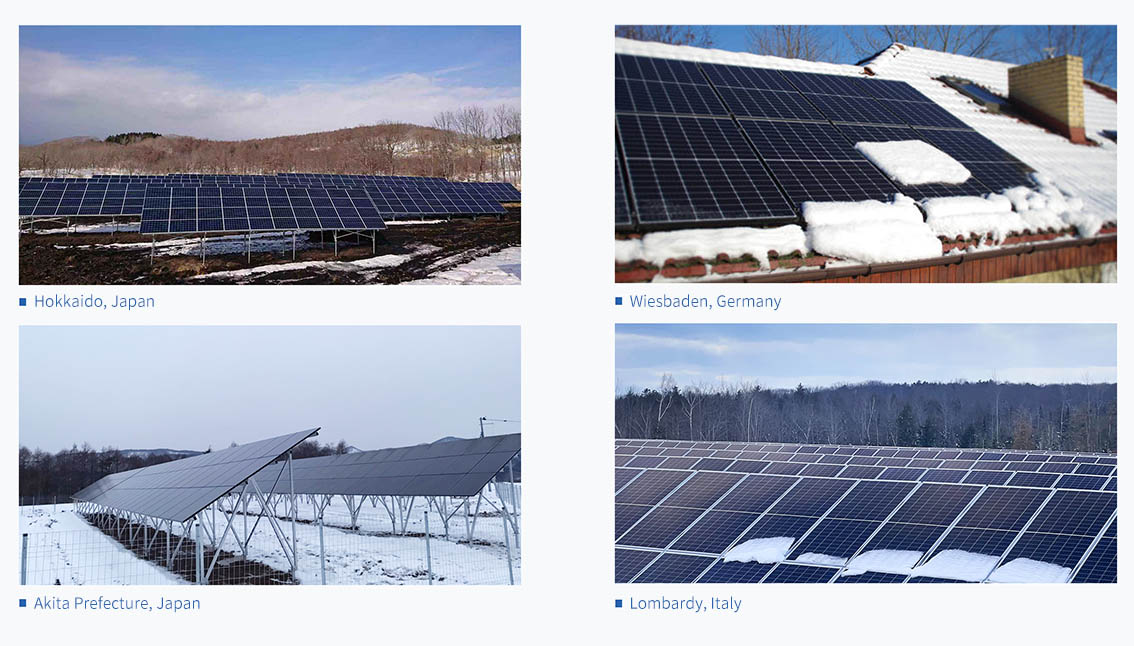
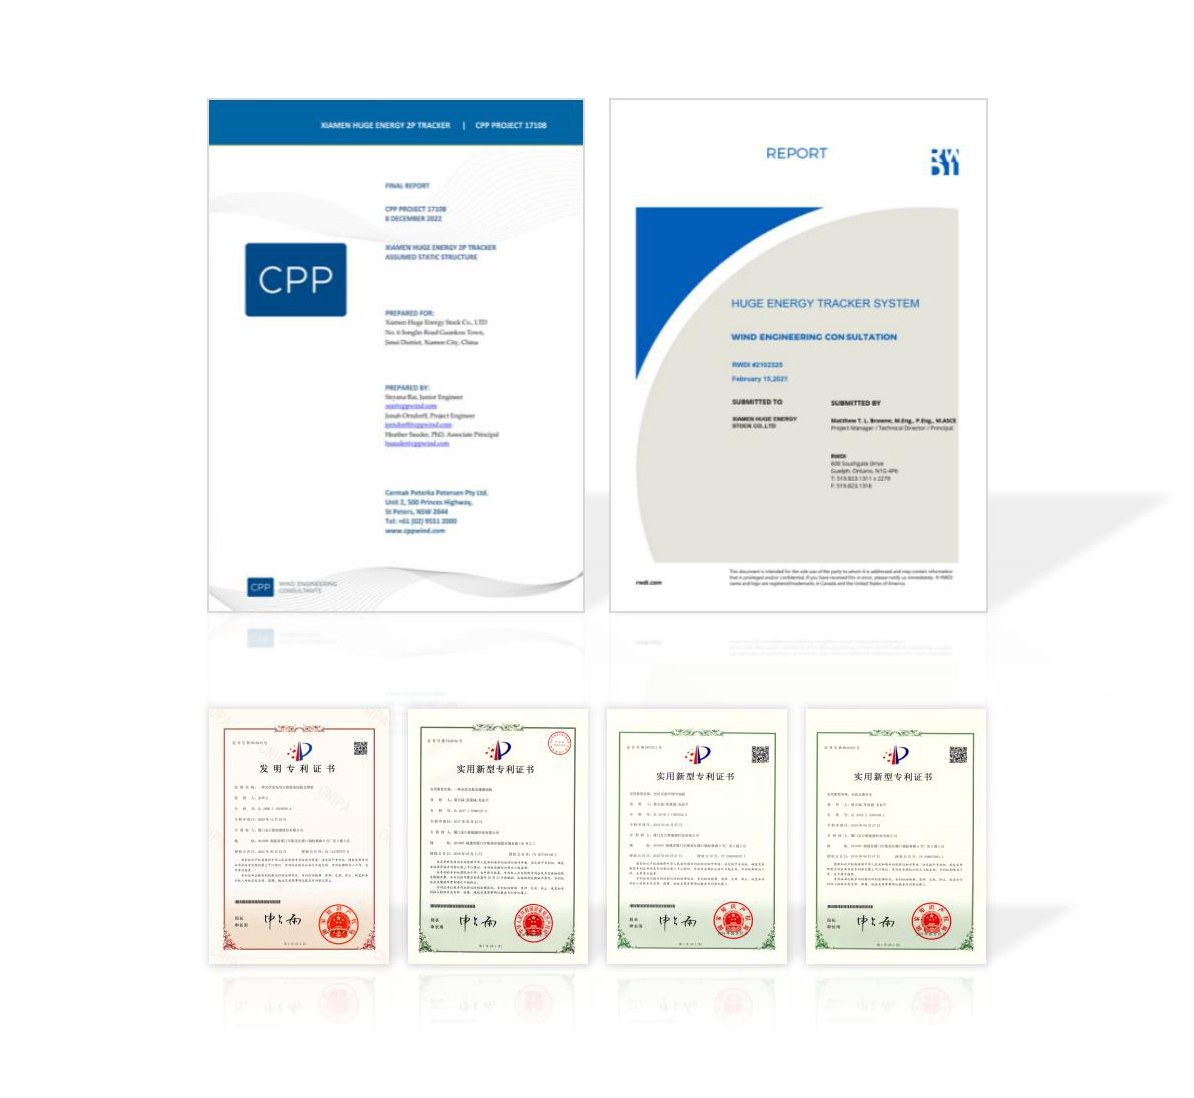
The flexible prestressed cable-stabilized wind resistance system from Huge Energy has passed CPP & RWDI wind tunnel test certification, effectively withstanding typhoons up to level 15. Its design, featuring north-south stabilizing tie rods and wind-resistant cables, enhances the overall stability of the structure, ensuring safety under extreme weather conditions.
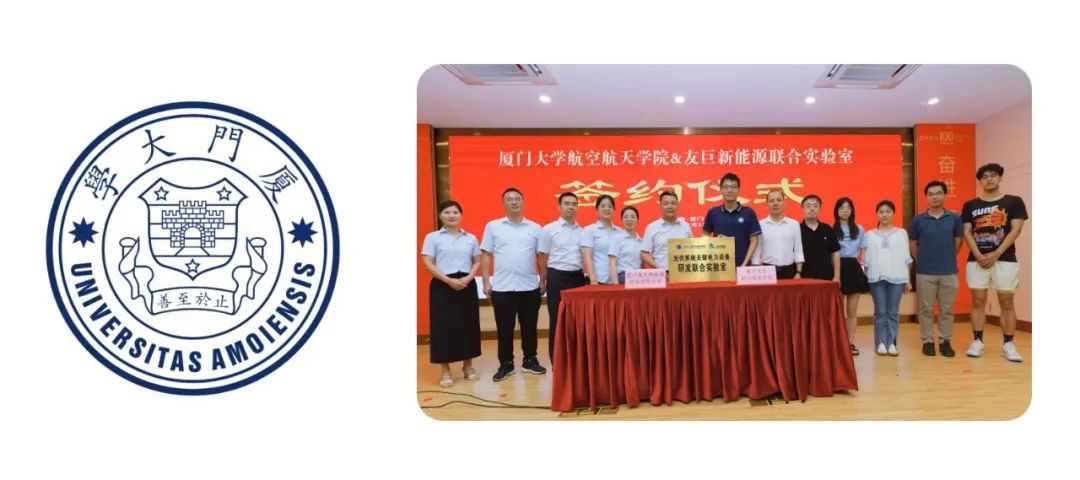
To drive continuous technological innovation, Huge Energy has built an experienced R&D and production team and a comprehensive laboratory, consistently optimizing products and improving structural performance, which realizes the full-scene photovoltaic system solutions, and achieve zero-risk accidents over the past decade.
Choosing Huge Energy means opting for efficient energy solutions and a commitment to sustainability. A team of experts pays careful attention to every process to meet your expectations and maximize the return on your investment!