• Solar PV Mounting Roof Hook

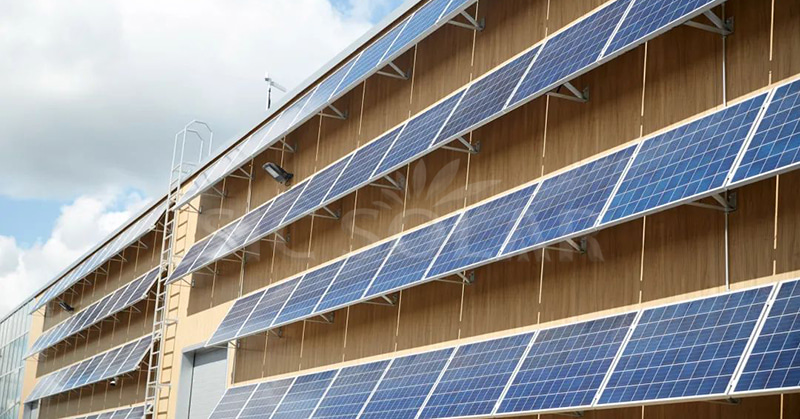
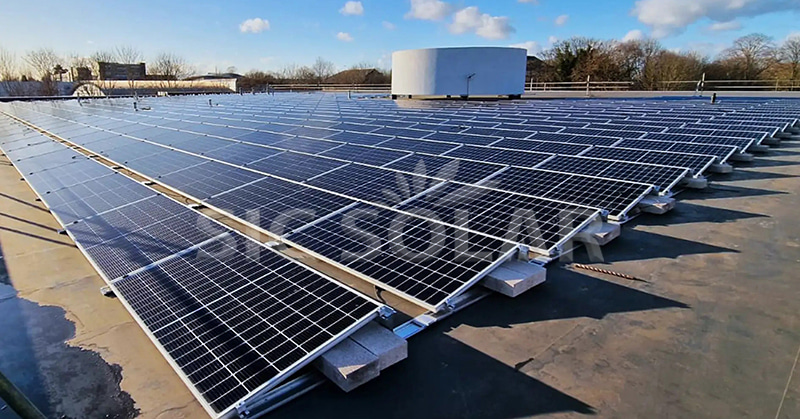
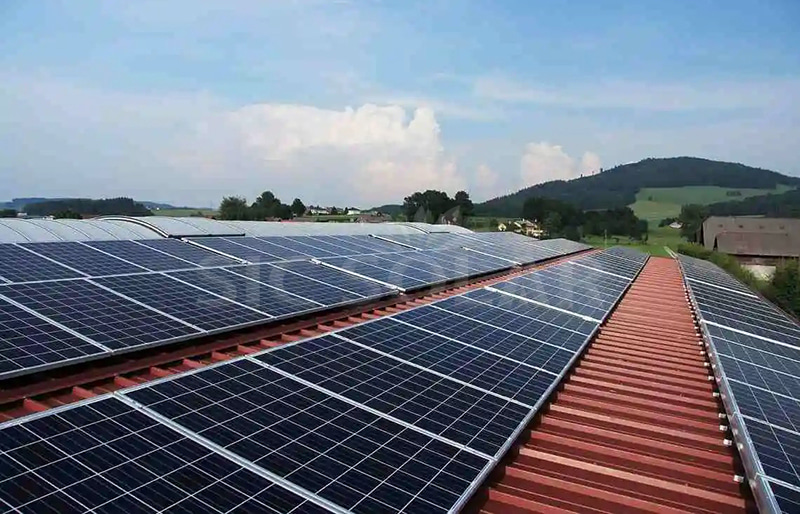
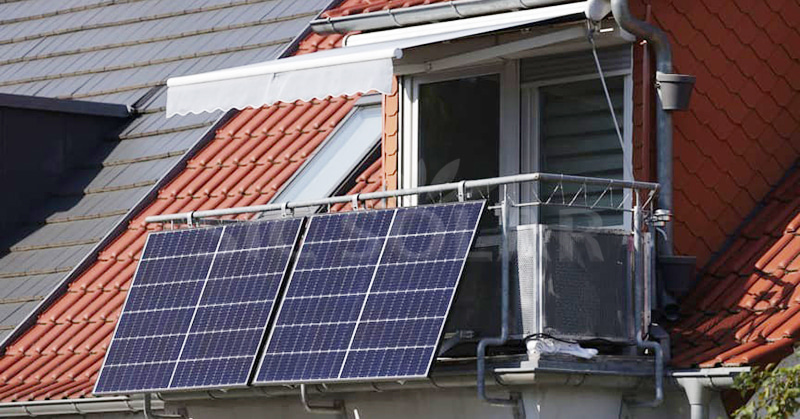
    The solar panel roof hook is an important part of the solar photovoltaic module system. It is used to secure and support the solar panels, ensuring their stable installation on the roof. At the same time, it can adapt to the needs of different roof structures and improve the installation efficiency and stability of solar panels.

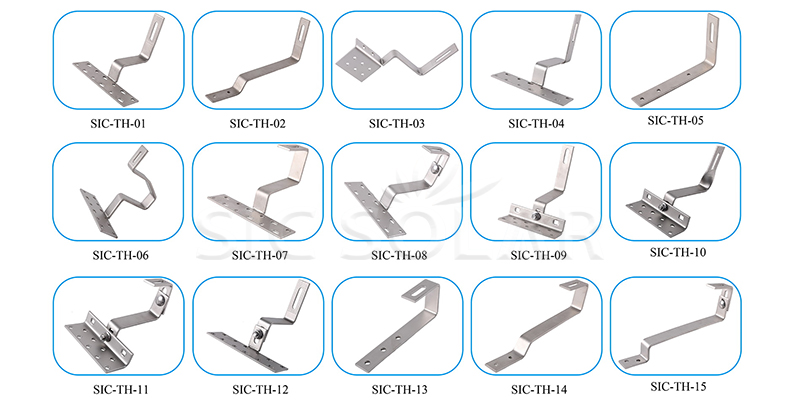
    This roof hook for tile roofs is one of the solar panel roof hook products. Its base model comes with 1 bolt, 1 Tmodule and 3 screws. It can also be made adjustable. Pantile Adjustable Roof Hook is flexible in adjustment both in height and width, Pantile adjustable roof hook is flexible in adjustment both in height and width, two individual adjustable part in height and one in width, which make them work in various pantile roof. And the material of the roof hook is sus304, equivalent to 1.4301 stainless steel. If you have the need, we can also customize this product according to your requirements.

    SUS roof hooks have the following features:
    1. Easy to install
    2. High durability
    3. Protect against extreme weather

    4. Wide applicability

    If you are interested in this kind of roof hook, please feel free to contact us. (sales7@landpowersolar.com)

  • How to Install Solar Lights in Shaded Areas

    Solar lights are a great way to light up our garden or walkway, but it can be a challenge to install them in shaded areas. Without enough direct exposure of sunlight, their performance can suffer. While don’t worry, installing solar powered outdoor lights in shaded areas isn’t impossible, it just requires a little extra planning and creativity.


    Let’s talk about the basics. Solar lamps rely on sunlight to charge during the day, so ideally, they should be placed in direct sunlight. But if we have a shaded area, look for solar lights that come with separate solar panels is a good choice. These solar split lights allow us to place the solar panel in a sunny spot, while the light fixture itself can be positioned in the shade where we need illumination. The solar panel is connected to the light by a cable, which can often be extended to reach the optimal charging location. When selecting this type of light, it is important to check the length of the cord to make sure it’s long enough to reach from the sunny area to the shaded location. This setup allows us to maximize sunlight exposure for charging, while still lighting up shaded spaces.


    Investing in highly efficient outdoor solar lighting is an additional choice. Even if our yard doesn’t receive a lot of direct sunlight, LED lights can still perform admirably because some more recent models are made to be efficient even in dim light or overcast weather. But remember that they may not be as bright or persist into the night as they would in places with full sunlight. For areas with consistent shade, we can also look into some solar lights with rechargeable or hybrid battery systems. Some models allow us to charge the batteries using electricity or a USB port during cloudy day or in the winter, ensuring we have light no matter the conditions.


    solar split lights 

    When installing solar lights in shaded areas, strategic placement can make all the difference. Instead of placing the lights directly in dense shade, try positioning them in spots that get at least partial sunlight for part of the day, such as under trees with thinner branches or near the edge of a shaded area where some sunlight filters through. We should also consider reflective surfaces nearby, like white walls or metal fences, which help bounce light onto the solar panels.


    At last, we need remember to routinely inspect and clean our solar panels. Debris like dust or leaves can obstruct the sunlight that the panels are attempting to capture, even in regions that are shadowed. Even when the sun isn’t shining directly on them, keeping the clean guarantees that they can charge as effectively as possible and provides us with the best outcomes.

  • Comparing and Contrasting Outdoor Solar Spotlights Finding the Perfect Choice for Your Lawn

    Outdoor solar spotlights are an excellent choice for illuminating your outdoor spaces while minimizing energy consumption. With various options available in the market, it can be challenging to pick the right one for your needs. In this article, we will compare and contrast different products and services related to outdoor solar spotlights, solar-powered lawn lamps, solar grass outdoor spotlights, solar spotlights, solar spotlights for grass, and LED solar spotlights, helping you make an informed decision.

    1. Solar Powered Lawn Lamps

    Solar-powered lawn lamps are an eco-friendly and convenient way to brighten up your lawn or garden. These lamps absorb sunlight during the day and store energy in batteries, illuminating your outdoor space at night. One notable advantage of solar-powered lawn lamps is their easy installation, as they don’t require any complicated wiring. Moreover, they are often equipped with light sensors that automatically switch them on and off, saving energy and ensuring continuous light throughout the night.

    2. Solar Grass Outdoor Spotlights

    Solar grass outdoor spotlights are designed specifically for illuminating grassy areas. These spotlights are equipped with spikes that can be easily inserted into the ground, making them perfect for highlighting walkways, gardens, or specific features in your yard. The advantage of using solar grass outdoor spotlights is that they are discreet and blend well with the surrounding landscape while providing a soft and ambient glow.

    3. LED Solar Spot Lights

    LED solar spot lights offer a brighter and more focused light than traditional solar spotlights. These lights utilize Light Emitting Diodes (LEDs) as their light source, resulting in a higher intensity of light. LED solar spotlights are ideal for illuminating specific objects, such as statues, trees, or architectural elements, with enhanced clarity and precision.

    Which One Should You Choose?

    The choice between solar-powered lawn lamps, solar grass outdoor spotlights, and LED solar spot lights ultimately depends on your specific lighting requirements and the desired effect you want to achieve in your outdoor space.

    If you have a larger lawn or garden to illuminate, solar-powered lawn lamps are a suitable option as they provide a broader range of light. They are also perfect if you prefer a hassle-free installation process and automated lighting.

    For highlighting specific areas or creating an enchanting ambiance in your garden, solar grass outdoor spotlights can beautifully blend with your surroundings. These spotlights work well for creating pathways or accentuating key landscape features.

    On the other hand, if you aim to showcase particular objects or architectural elements, LED solar spot lights offer a more focused and bright illumination. Their precision and intensity make them ideal for spotlighting unique elements and adding a touch of elegance to your outdoor space.

    In conclusion, outdoor solar spotlights offer an energy-efficient and environmentally-friendly solution to illuminate your outdoor areas. Whether you opt for solar-powered lawn lamps, solar grass outdoor spotlights, or LED solar spot lights, each option brings unique benefits to suit your specific lighting needs. Assess your requirements, consider the aesthetics, and choose the option that enhances your outdoor space while minimizing your energy consumption.

  • A Beginner's Guide to Using Adjustable Aluminium Tile Roof Hook Solar Mounting

    Solar energy is becoming increasingly popular as a cost-effective and environmentally friendly way to generate electricity. Installing solar panels on your roof is a great investment, and with the right mounting system, it can be a straightforward process. In this beginner’s guide, we will walk you through the step-by-step process of using adjustable aluminium tile roof hook solar mounting.

    Step 1: Safety First

    Before starting any installation, safety should be your top priority. Make sure you have the necessary safety equipment, such as gloves, safety glasses, and a sturdy ladder. Always work with caution and consult a professional if you have any concerns.

    Step 2: Assess Your Roof

    Begin by assessing your roof and determining its suitability for solar panel installation. Ensure that your roof is in good condition, with no loose or damaged tiles. It’s also essential to check for any shading that could impact the efficiency of your solar panels.

    Step 3: Gather the Required Materials

    To install adjustable aluminium tile roof hook solar mounting, you will need the following materials:

    • Adjustable aluminium roof hooks

    • Solar panel mounting brackets

    • Stainless steel hardware

    • Drill with metal drill bits

    • Measuring tape

    • Silicone sealant

    Step 4: Proper Placement of Roof Hooks

    Start by identifying the optimal location for your solar panels. Once determined, position the roof hooks on your roof tiles accordingly. Ensure that the hooks are aligned properly and securely fastened. Keep a suitable distance between each hook to provide adequate support for your solar panels.

    Step 5: Attach the Mounting Brackets

    After positioning the roof hooks, you can now attach the solar panel mounting brackets. Secure the brackets onto the hooks using the provided stainless steel hardware. Ensure that the brackets are level and tightly fastened to provide a stable foundation for your solar panels.

    Step 6: Install the Solar Panels

    With the roof hooks and mounting brackets in place, it’s time to install your solar panels. Carefully lift each solar panel and align it with the mounting brackets. Attach the panels firmly and securely using the provided hardware. Double-check that each panel is properly aligned and positioned.

    Step 7: Seal the Tile Roof

    To prevent any water leakage, apply silicone sealant around the roof hooks and mounting brackets. This will help create a watertight seal and protect your roof from potential damage.

    Step 8: Test and Inspect

    Once the installation is complete, it’s crucial to test and inspect your solar panel system. Check the connections, wiring, and ensure that everything is functioning correctly. If you’re unsure, consult a professional to verify the system’s performance and safety.

    In conclusion, installing adjustable aluminium tile roof hook solar mounting is a manageable task when following a step-by-step approach. Remember to prioritize safety, assess your roof, gather the necessary materials, properly position the roof hooks and mounting brackets, install the solar panels securely, seal the tile roof, and thoroughly test and inspect the system. By doing so, you’ll be well on your way to harnessing the power of the sun and enjoying the benefits of solar energy.

  • Solar Street Lights Comparing the Best Options for Quality and Efficiency

    When it comes to outdoor lighting solutions, solar street lights have gained significant popularity due to their energy efficiency and cost-effectiveness. In this article, we will compare and contrast different products and services related to solar street lights, LED lights, and all-in-one street lights. Whether you’re looking for a reliable 100W solar street light or a versatile outdoor light, we have you covered.

    Solar Street Lights

    Solar street lights harness the power of the sun to provide illumination during the night. They eliminate the need for traditional electrical connections, making them environmentally friendly and cost-effective in the long run. Here, we’ll explore some standout options for solar street lights, focusing on their features, performance, and reliability.

    All-in-One Street Lights

    All-in-one street lights are an excellent choice for those looking for easy installation and maintenance. These lights integrate the solar panel, battery, and LED light into a single unit, providing a hassle-free lighting solution. With no complex wiring required, all-in-one street lights are suitable for various applications and offer versatility in terms of placement.

    LED Lights

    LED lights are known for their energy efficiency and durability. Compared to traditional lighting technologies, LED lights consume significantly less energy while providing brighter and more uniform illumination. LED street lights offer excellent longevity, which reduces maintenance costs in the long term. These lights come in various wattages, including the popular 100W option that efficiently lights up large outdoor areas.

    The Best Solar Street Light for You

    To make an informed decision, consider the following factors:

    1. Brightness and Illumination: Look for solar street lights that provide sufficient brightness and wide-angle illumination, ensuring optimal visibility and safety.

    2. Battery Capacity and Efficiency: A high-capacity battery ensures consistent performance even during cloudy days. Opt for lights with efficient battery technology for extended lighting hours.

    3. Durability and Weather Resistance: As outdoor lighting, solar street lights should be built to withstand harsh weather conditions. Ensure that the lights are weatherproof and made of durable materials.

    4. Installation and Maintenance: Evaluate the installation process and ongoing maintenance requirements. All-in-one street lights usually have a simple installation process, while LED lights may require separate setups for the panel and fixture.

    5. Warranty and Customer Support: Check the warranty period and the availability of reliable customer support. A longer warranty provides peace of mind, and responsive customer service ensures prompt assistance if needed.

    By assessing these factors, you can find the ideal solar street light that meets your requirements in terms of efficiency, longevity, and budget.

    In conclusion, solar street lights, all-in-one street lights, and LED lights are all viable options for outdoor lighting. Consider the specific features and benefits offered by each product to find the perfect lighting solution for your needs. With the advances in solar technology and energy-efficient LED lighting, you can now contribute to a greener future while enjoying reliable and high-quality illumination in your outdoor spaces.

  • The Future of Solar Energy SpolarPV's S-Elite Plus 680W Solar Panel

    SpolarPV's S-Elite Plus series continues to push the boundaries of solar technology, and the new 680W Solar Panel is a perfect example. With its superior power output, cutting-edge design, and high durability, this panel is ideal for large-scale installations, rooftops, carports, and more.


    Exceptional Power and Efficiency:


    The 680W Solar Panel features 210mm half-cut cells, arranged in a 12x11 configuration with a total of 132 cells. Its impressive 21.91% conversion efficiency ensures that every bit of sunlight is maximized for energy generation, making it a high-performance solution for demanding energy needs.


    Anti-Reflection and High Mechanical Strength:


    Engineered for both performance and durability, the panel includes anti-reflection technology to boost energy production in various light conditions, especially in low-light environments. In addition, the panel is built with high mechanical strength, allowing it to withstand extreme weather conditions such as heavy snow and strong winds, making it suitable for diverse climates.


    Optimized for Large-Scale and Versatile Applications:


    The S-Elite Plus 680W Solar Panel is designed to meet the energy demands of large-scale solar power stations, but its versatility extends to rooftops and carports as well. Whether used in residential, commercial, or industrial settings, its adaptability and high output make it a reliable choice.


    Durability in Extreme Environments:


    Thanks to its high environmental tolerance, the 680W Solar Panel is built to operate efficiently even in harsh environmental conditions, ensuring long-term reliability. Its excellent low-light performance further adds to its suitability for projects in various regions and settings.


    Conclusion:


    SpolarPV’s 680W S-Elite Plus Solar Panel is a game-changer in the solar industry. With high efficiency, robust durability, and a versatile design, it offers the perfect solution for a wide range of applications. Whether you’re looking for a powerful panel for a large-scale solar farm or a dependable option for rooftop installations, the 680W panel delivers on all fronts. Reach out to SpolarPV to discover how this high-performance solar panel can take your energy projects to the next level.


    680W Solar module

  • Solar Lights as a Key Element in Sustainable Living

    As the world shifts toward more eco-friendly practices, solar lights are becoming a crucial part of the move toward sustainable living. They offer a simple solution to a complex problem - how to reduce reliance on traditional energy sources without sacrificing comfort or convenience. By using solar energy, they make it easy to incorporate renewable power into everyday life.


    Solar outdoor lights take advantage of the sun, a resource that is both abundant and free. Instead of drawing electricity from the grid, they gather sunlight during the day and store it in batteries for use at night. This means less strain on the planet’s resources and a direct reduction in the carbon footprint associated with lighting. The environmental impact is clear, as each solar light reduces the demand for fossil-fuel-generated power.


    The practical benefits of SLD solar LED lights go hand in hand with their environmental advantages. They are relatively easy to install, don’t require complex wiring, and need little maintenance. Once set up, they can provide years of reliable lighting without adding to monthly energy bills. Their cost-effectiveness makes them an attractive option for anyone looking to save money while also making a positive environmental choice.


    SLD solar LED lights 

    Solar powered lighting also plays a transformative role in areas where access to electricity is limited. In many rural or underserved regions, reliable power is hard to come by, but the sun is always available. Solar lights offer a reliable, low-cost solution that allows communities to illuminate streets, homes, and public spaces without needing to expand costly infrastructure. This technology has the potential to improve quality of life while also supporting sustainability goals.


    Solar lights clearly represent more than just a technological innovation - they are a pathway to more sustainable living. As they become more widespread and advanced, they will continue to play a key role in helping both individuals and communities reduce their environmental impact and build a more sustainable future.

  • Tips and Tricks for Maximizing Your Higon Commercial Storage Solar System

    If you’re an enthusiastic supporter of hybrid energy systems, you’re likely aware of the impressive capabilities of the Higon 30kW, 50kW, 100kW, and 150kW commercial storage solar systems. These powerful solutions are revolutionizing the way businesses harness and store solar energy. To help you make the most of your investment, we’ve compiled a comprehensive list of tips and tricks. Read on to discover how to optimize the performance and efficiency of your Higon commercial storage solar system.

    1. Conduct a Thorough Energy Audit

    Before diving into the installation process, it’s essential to assess your energy needs accurately. Conduct an energy audit to understand your current electricity consumption patterns. By analyzing your energy usage, you’ll gain valuable insights into the required system capacity and storage capabilities for your business. This information will help you select the appropriate Higon commercial storage solar system.

    2. Optimize Panel Placement

    Proper placement of solar panels significantly impacts their efficiency. Ensure the panels receive maximum sunlight exposure to generate optimal energy. Evaluate your property to determine the best location for placement, taking into account the position of nearby structures, trees, and any potential obstructions that may cast shadows on the panels.

    3. Regularly Clean and Maintain Panels

    Maintaining clean solar panels is crucial for their optimal performance. Dust, dirt, and debris can accumulate, reducing energy conversion efficiency. Regularly inspect and clean the panels according to the manufacturer’s guidelines. This practice will help maximize energy output and extend the lifespan of your Higon storage system.

    4. Implement a Monitoring System

    To keep a close eye on your system’s performance, consider installing a monitoring system. These systems enable you to track energy production, identify any potential issues, and optimize energy consumption. Monitoring software and apps provide real-time data, empowering you to make informed decisions about how to utilize your stored energy effectively.

    5. Opt for Regular System Upgrades

    As technology advances, so do the efficiency and capabilities of commercial storage solar systems. Stay up to date with the latest developments and consider upgrading your Higon system periodically. Upgrades can enhance performance, storage capacity, and overall reliability, ensuring your business benefits from the cutting-edge technology available.

    6. Maintain Battery Health

    For hybrid systems, the health of the storage batteries is crucial. Regularly inspect and maintain the battery bank to ensure optimal performance. Implement a routine maintenance schedule, test battery capacity periodically, and replace any aging or faulty batteries promptly. Doing so will optimize the overall efficiency of your Higon commercial storage solar system.

    Implementing these tips and tricks will empower you to make the most of your Higon 30kW, 50kW, 100kW, or 150kW commercial storage solar system. By conducting a thorough energy audit, optimizing panel placement, cleaning and maintaining panels, implementing monitoring systems, upgrading as necessary, and maintaining battery health, you’ll ensure the highest levels of efficiency, reliability, and savings for your business. Embrace the power of hybrid energy and harness the full potential of your Higon commercial storage solar system today!

  • Maximize balcony space for solar power with Corigy balcony mounting hook

    In recent years, solar energy has gained significant popularity as a renewable and sustainable solution for meeting our increasing energy demands. One exciting development in this field is the emergence of balcony solar systems.  In this article, we will delve into the fascinating world of balcony solar and explore how it works, its benefits, and why it's becoming a popular choice for commercial and residential buildings.


    How balcony solar system works?
    Balcony solar systems operate on the same principles as conventional solar panels. They contain photovoltaic (PV) cells that convert sunlight into electricity. When sunlight hits the PV cells, it excites the electrons within, generating a direct current (DC) electrical charge. This DC electricity is then converted into alternating current (AC) electricity by an inverter, which can be used to power appliances and other electrical devices in your home.
    apartment balcony solar panel hook


    Benefits of balcony solar systems?

    a. Space Efficiency: One of the key advantages of balcony solar systems is their space efficiency. By utilizing vertical surfaces such as balcony railings or walls, these systems make it possible to generate solar power even in limited-space environments.


    b. Easy Installation: Balcony solar systems are designed for easy installation and require minimal modifications to your existing structure. They can be mounted securely on balcony railings or attached to walls without extensive structural changes, making them accessible to a wider range of homeowners.


    c. Flexibility: The compact size and flexible mounting options of balcony solar panels allow for easy adjustment and repositioning to maximize sun exposure. They can be angled or adjusted throughout the day to capture the most sunlight, ensuring optimal energy production.


    d. Cost Savings: By generating your own electricity, balcony solar systems can help reduce your monthly energy bills. Additionally, some regions offer incentives, such as feed-in tariffs or tax credits, which further contribute to cost savings and make the initial investment more affordable.


    e. Environmental Impact: Choosing balcony solar helps to mitigate the environmental impact of traditional electricity generation. By using clean, renewable solar energy, you are reducing greenhouse gas emissions and contributing to a more sustainable future.


    balcony solar mounting structure manyfacturer


    How much electricity can a balcony photovoltaic system generate every day?
    According to the feedback from one of our customer in Poland, he install 8 panel with our balcony solar module mounting bracket, "I currently achieve "production" of up to 3.5 kW of power and up to 20 kWh of energy per day." he said.

    How much electricity can a balcony photovoltaic system generate every day?

    home use solar module balcony bracket


    Is Balcony Solar Right for You?

    If you reside in an urban environment and have limited roof space, balcony solar systems offer an attractive alternative for harnessing solar power. They offer the potential to generate clean energy and reduce your reliance on the traditional power grid. However, it's important to consider factors such as the sun exposure on your balcony, any shading that may affect solar panel performance, and local regulations before making a decision.

    Corigy's  professional engineering team provides you with professional products, welcome to inquire.


    CORIGY SOLAR more professional and flexible solar mounting solutions waiting for you here! CONTACT US!
    Above news from CORIGY SOLAR Sales & Marketing department
    Phone: +0086-592-6883200
    E-mail: sales@corigy.com


  • Step-by-Step Guide Using Solar Installation Tool Kits for Beginners

    | /

    Whether you’re a DIY enthusiast or an aspiring solar panel installer, having the right tools is essential for a successful solar installation project. With the right solar installation tool kit, you can ensure efficiency, accuracy, and safety throughout the process. In this step-by-step guide, we’ll walk you through the process of using solar installation tool kits, providing helpful tips and tricks along the way. Let’s get started!

    Step 1: Assess Your Needs

    Before diving into any project, it’s important to assess your specific requirements. Determine the size and scope of your solar installation project, as this will help you identify the tools you’ll need. Consider factors such as panel size, mounting type, and electrical connections.

    Step 2: Gather the Essential Tools

    Once you have a clear understanding of your needs, it’s time to gather the necessary tools. Here are some common tools you’ll find in a solar installation tool kit:

    1. Solar Panel Mounting Tools: These tools include wrenches, socket sets, and screwdrivers. They will help you secure the solar panels to their mounting structure.

    2. Wire Strippers and Cutters: These tools are crucial for removing insulation from wires and cutting them to the desired length.

    3. Crimping Tools: These tools are used to create secure connections between wires, ensuring proper electrical conductivity.

    4. Multimeter: A multimeter allows you to measure voltage, current, and resistance, helping you troubleshoot any electrical issues.

    5. Cable Clips and Ties: These accessories help keep the wiring organized and secure, preventing any potential damage or hazards.

    6. Safety Equipment: Don’t forget essential safety gear, such as gloves, safety glasses, and a hard hat. Protecting yourself is paramount during any installation project.

    Step 3: Familiarize Yourself with the Tools

    Before getting started, take some time to familiarize yourself with each tool. Read the accompanying user manuals and practice using the tools correctly. Understanding how each tool functions will provide confidence and ensure safer usage.

    Step 4: Plan and Prepare the Installation Area

    Now that you have your tools ready, it’s time to plan and prepare the installation area. Clear any obstructions, read the installation instructions provided with your solar panels, and mark the spots where the panels will be mounted.

    Step 5: Execute the Installation

    With everything in place, it’s time to start the installation. Follow the manufacturer’s instructions carefully, ensuring each panel is securely mounted and wired according to the provided guidelines. Regularly use your tools to double-check tightness and proper connections.

    Step 6: Test the System

    Once the installation is complete, it’s important to test the system to ensure everything is functioning as expected. Use the multimeter to measure voltage outputs and monitor the system for any signs of irregularities.

    Step 7: Clean Up and Maintenance

    Finally, clean up the installation area by removing any debris and tidying up the wiring. Regularly inspect your solar panels and the surrounding area for any signs of wear or damage. Perform ongoing maintenance to prolong the lifespan of your solar installation.

    Congratulations! You’ve successfully completed the process of using a solar installation tool kit. By following these steps and utilizing the right tools, you can confidently tackle your solar project while prioritizing safety and efficiency. Enjoy the benefits of clean, renewable energy for years to come!